under revision
A Brief History of FreeBSD and UNIX
 The original UNIX operating system was developed at AT&T Bell Laboratories. Two AT&T engineers Ken Thompson and Dennis Ritchie were the main driving forces behind the UNIX project.
The origins of UNIX can probably be traced to the spring of 1969. It was an offshoot of a largely unsuccessful effort by a conglomeration of companies to develop a "time-sharing" operating system,
one in which a mainframe system's limited computing resources could be shared among many different users logged in simultaneously from remote terminals.The operating system that this consortium developed was called MULTICS; although it introduced many innovative features and created the template for what we think of today as a multiuser operating system, it never achieved any commercial success to speak of, and AT&T's Bell Labs pulled out of the project.
Ken Thompson, one of the members of the AT&T team working on MULTICS, continued in the same spirit by writing (with the help of Ritchie and others) a new operating system, similar to MULTICS but smaller and simpler, for the DEC PDP-7 minicomputer instead of expensive mainframes as before. Its name, UNIX, evoked the new system's simplicity in comparison to the sprawling MULTICS.
To support and underpin the new system, Thompson and Ritchie developed a new programming language called C, which made development far faster than prior efforts (which had relied on the DEC assembly language specific to the PDP-7). The C programming language and UNIX (also, interchangeably, Unix) are two of the most important developments in the history of the computer, not least because C was the first "portable" programming language it allowed applications (written in C) to be ported to other types of computer platforms relatively easily. Because UNIX was written in C, it was itself also portable and could be made to run on other types of computer platforms with comparatively little effort.This breakthrough, seemingly unremarkable from a modern perspective, was what led to the meteoric rise in popularity of UNIX and the software development tradition we take for granted today.
Note If it weren't for a game called "Space Travel" that he was writing in his spare time for the GE-645 mainframe computer (the platform for MULTICS), Ken Thompson might never have been inspired to write UNIX in the first place.
BSD Is Born
Because AT&T Bell Laboratories was not really in the business of selling computer operating systems, it licensed the UNIX operating system and its source code to various academic institutions relatively cheaply. The universities could save money by using this software instead of commercial equivalents with pricey licenses, and university students with access to this nifty technology could read the source code to see how everything worked. In return, AT&T got exposure, some pocket change, and a generation of computer scientists who had cut their teeth on AT&T technology. Everyone got something out of the deal. The best-known software distributed under this licensing plan was Unix.
Compared with modern operating systems, the original Unix had a lot of problems. Thousands of students had access to its source code, however, and hundreds of teachers needed interesting projects for their students. If a program behaved oddly, or if the operating system itself had a problem, the people who lived with the system on a day-to-day basis had the tools and the motivation to fix it. Their efforts quickly improved Unix and created many features we now take for granted. Students added the ability to control running processes, also known as job control.
The Unix S51K filesystem made system administrators cry like small children, so they replaced it with the Fast File System, whose features have spread into every modern filesystem. Many small, useful programs were written over the years, gradually replacing entire swaths of Unix.
One of the institutions that did a lot of early work on UNIX was the Computer Systems Research Group (CSRG) at the University of California at Berkeley. The CSRG participated in these improvements and also acted as a central clearinghouse for Unix code improvements. The CSRG collected changes from other universities, evaluated them, packaged them, and distributed the compilation for free to anyone with a valid AT&T UNIX license.
The CSRG made some very important contributions to UNIX, including the development of the UNIX File System (UFS) and the addition of the TCP/IP networking stack (The CSRG also contracted with the Defense Advanced Research Projects Agency (DARPA) to implement various features in Unix, such as TCP/IP).
The CSRG made so many changes to UNIX that it released the resulting collection of software, known as the Berkeley Software Distribution.
Note Contrary to popular belief, CSRG did not do the first port of UNIX to the DEC VAX. The first VAX port was done at AT&T Bell Labs, but this port did not support the VAX's virtual memory system. CSRG thus undertook the task of porting BSD UNIX to the VAX, in the process adding support for the platform's virtual memory architecture.CSRG made much of the BSD source code available to the public for free, and a CSRG engineer by the name of Bill Jolitz ported BSD to the Intel x86 platform in 1991. The port was called 386BSD. In addition, Jolitz and some of his colleagues from CSRG formed a commercial spin-off company named Berkeley Software Distribution, Incorporated (BSDi), and sold a commercial version of BSD that included source code.
BSD users took the software and improved it further, then fed their enhancements back into BSD. Today, we consider this to be a fairly standard way for an open source project to run, but in 1979 it was revolutionary. BSD was also quite successful; if you check the copyright statement on an old BSD system, you’ll see this:
Copyright 1979, 1980, 1983, 1986, 1988, 1989, 1991, 1992, 1993, 1994Yep, 20 years of work—a lifetime in software development. How many other pieces of software are not only still in use, but still in active development,
The Regents of the University of California. All rights reserved.
20 years after work began? In fact, so many enhancements and improvements went into BSD that the CSRG found that over the years, it had replaced almost all of the original Unix with code created by the CSRG and its contributors.
You had to look hard to find any original AT&T code. Eventually, the CSRG’s funding ebbed, and it became clear that the BSD project would end. After some political wrangling within the University of California, in 1992 the BSD code was released to the general public under what became known as the BSD license.
The BSD LicenseBSD code is available for anyone to use under what is probably the most liberal license in the history of software development. The license can be summarized as follows:
- Don’t claim you wrote this.
- Don’t blame us if it breaks.
This means that you can do almost anything you want with BSD code. (The original BSD license did require that users be notified if a software product included BSD-licensed code, but that requirement was later dropped.) There’s not even a requirement that you share your changes with the original authors! People were free to take BSD and include it in proprietary products, open source products, or free products—they could even print it out on punch cards and cover the lawn with it. You want to run off 10,000 BSD CDs and distribute them to your friends? Enjoy. Instead of copyright, the BSD license is sometimes referred to as copycenter, as in Take this down to the copy center and run off a few for yourself. Not surprisingly, companies such as Sun Microsystems jumped right on it: It was free, it worked, and plenty of new graduates had experience with the technology. One company, BSDi, was formed specifically to take advantage of BSD Unix.
- Don’t use our name to promote your product.
The AT&T/CSRG/BSDi Iron Cage Match
At AT&T, UNIX work continued apace even as the CSRG went on its merry
way. AT&T took parts of the BSD Unix distribution and integrated them with its UNIX, then relicensed the result back to the universities that provided those improvements.
This worked well for AT&T until the company was broken up and the resulting companies were permitted to compete in the computer software business.
AT&T had one particularly valuable property: a high-end operating system that had been extensively debugged by thousands of people. This operating system had many useful features, such as
- a variety of small but powerful commands,
- a modern filesystem,
- job control, and
- TCP/IP
Berkeley’s public release of the BSD code in 1992 was met with great displeasure from USL. Almost immediately, USL sued the university and the software companies that had taken advantage of the software, particularly BSDi.
The University of California claimed that the CSRG had compiled BSD from thousands of third-party contributors unrelated to AT&T, and so it was the CSRG’s intellectual property to dispose of as it saw fit.
This lawsuit motivated many people to grab a copy of BSD to see what all the fuss was about, while others started building products on top of it. One of these products was 386BSD, which would eventually be used as the core of FreeBSD 1.0.
In 1994, after two years of legal wrangling, the University of California lawyers proved that the majority of AT&T UNIX was actually taken in its entirety from BSD, rather than the other way around. To add insult to injury, AT&T had actually violated the BSD license by stripping the CSRG copyright from files it had assimilated. (Only a very special company can violate the world’s most liberal software license!) A half-dozen files were the only sources of contention, and to resolve these outstanding issues, USL donated some of them to BSD while retaining some as proprietary information.
Once the dust settled, a new version of BSD Unix was released to the world as BSD 4.4-Lite. A subsequent update, BSD 4.4-Lite2, is the grandfather of the current FreeBSD, as well as ancestor to every other BSD variant in use today.
FreeBSD Is Born
One early result of BSD was 386BSD, a version of BSD designed to run on the cheap 386 processor (At the time, several thousand dollars for a computer was dirt cheap). The 386BSD project successfully ported BSD to Intel’s 386 processor, but it stalled. After a period of neglect, In 1993, two groups of developers became dissatisfied with the direction in which Bill and Lynne Jolitz were taking 386BSD, and they took the freely available, stagnant source code and as would become a tradition in the open-source community for many years to come started doing their own work on it (Several other groups started their own branches off of 386BSD around the same time, of which only NetBSD remains).
- The first of these groups was FreeBSD, which focused on making the system as easy as possible to use for non technical users and directed its efforts primarily upon Intel x86 hardware.
- A second group, NetBSD, started work slightly later; it sought to bring BSD to every possible hardware platform. If it even slightly resembles a computer, chances are that you'll be able to run NetBSD on it.
- OpenBSD, a third group that dedicated itself to being the most secure operating system available, split off from the NetBSD group somewhat later.
BSD 4.4-Lite2 was not a complete operating system—in particular, those few files AT&T had retained as proprietary were vital to the system’s function (After all, if those files hadn’t been vital, AT&T wouldn’t have bothered!).
The FreeBSD development team worked frantically to replace those missing files, and FreeBSD 2.0 was released shortly afterward. Development has continued ever since.
Today, FreeBSD is the most popular of the BSD-based, UNIX-like operating systems, largely because of its generalist approach and wide applicability to everyday tasks.
Nowadays FreeBSD is a full-fledged operating system that's suitable for everything from the most security-sensitive, performance-demanding server applications to the most user focused, graphics-intensive productivity applications on the desktop.
Is used across the Internet by some of the most vital and visible Internet-oriented companies. Yahoo! runs almost entirely on FreeBSD. IBM, Nokia, Juniper, NetApp, and many other hardware companies use FreeBSD in embedded systems where you’d never even know it unless someone told you. The fact is, if a company needs to pump serious Internet bandwidth, it’s probably running FreeBSD or one of its BSD relatives.
FreeBSD is all around you; you simply don’t see it because FreeBSD just works. The key to FreeBSD’s reliability is the development team and user community—which are really the same thing.
Since the release of FreeBSD 5.4 in 2005, the FreeBSD project has split once again and spawned PC-BSD, a flavor of FreeBSD specifically dedicated to desktop applications.
If you're interested in FreeBSD as a desktop operating system, look into PC-BSD
FreeBSD Development
There’s an old saying that managing programmers is like herding cats. Despite the fact that the FreeBSD development team is scattered across the world and speaks dozens of languages, for the most part, the members work well together as parts of the FreeBSD team. They’re more like a pride of lions than a collection of house cats.
Unlike some other projects, all FreeBSD development happens in public. Three groups of people are responsible for FreeBSD’s progress:
- committers,
- contributors, and
- users.
Committers
FreeBSD has about 500 developers, or committers. Committers have read-and-
write access to the FreeBSD master source code repository and can develop, debug, or enhance any piece of the system. (The term committer comes from their ability to commit changes to the source code.)
Because these commits can break the operating system in both subtle and obvious ways, committers carry a heavy responsibility. Committers are responsible for keeping FreeBSD working or, at worst, not breaking it as they add new features and evaluate patches from contributors.
Most of these developers are volunteers; only a handful are actually paid to do this painstaking work, and most of those people are paid only as it relates to other work. For example, Intel employs a committer to ensure that FreeBSD properly supports its network cards. FreeBSD has a high profile in the Internet’s heavy-lifting crowd, so Intel needs its cards to work on FreeBSD.
To plug yourself into the beehive of FreeBSD development, consider subscribing to the mailing list FreeBSD-hackers@FreeBSD.org, which contains
most of the technical discussion. Some of the technical talk is broken out into more specific mailing lists—for example, fine details of the networking implementation are discussed in FreeBSD-net@FreeBSD.org.
Every few years, the committer team elects a small number of its members to serve as a core team, or Core. Core’s work is simultaneously vital, underrated, and misunderstood.
Core is theoretically responsible for the overall management of FreeBSD, but in practice, it manages little other than resolving personality disputes and procedural conflicts among committers. Core also approves new committers and delegates responsibility for large parts of FreeBSD to individuals or groups. For example, it delegates authority over the ports and packages system to the ports management team.
Core does not set architectural direction for FreeBSD, nor does it dictate processes or procedures; that’s up to the committers, who must agree en masse. Core does suggest, cajole, mediate, and inspire, however.
Core also experiences the worst part of management. Some of the key functions of management in a company are oversight, motivation, and handling problems between people. Oversight is provided by the millions of users who will complain loudly when anything breaks or behaves unexpectedly, and FreeBSD committers are self-motivated. The ugly part of management is settling a squabble between two people, and that’s the part that Core has its hands full of. The status one gets from saying, “I’m in Core” is an insufficient reward for having to manage an argument between two talented developers who have gotten on each other’s nerves.
Contributors
In addition to the committer team, FreeBSD has thousands of contributors. Contributors don’t have to worry about breaking the main operating system source code repository; they just submit patches for consideration by
committers. Committers evaluate contributor submissions and decide what to accept and what to reject. A contributor who submits many high-quality patches is often asked to become a committer himself.
Users
Users are the people who run FreeBSD systems. It’s impossible to realistically estimate the number of FreeBSD users, although organizations such as the BSDstats Project are making an effort. After all, you can download the whole of FreeBSD for free and never register, upgrade, or email a mailing list. Companies such as Netcraft estimate that between 5 and 15 percent of all computers attached to the Internet are BSD-based. If you remove all the Windows boxes on corporate desktops, the percentage rises considerably.
Since FreeBSD is by far the most popular open source BSD, that’s not an inconsiderable number of machines. And since one FreeBSD server can handle hundreds of thousands of Internet domains, a disproportionate number of sites use FreeBSD as their supporting operating system. This means that there are hundreds of thousands, if not millions, of FreeBSD system administrators out in the world today.
The Design Philosophy of UNIX
Several things have kept UNIX going strong even after 30 years. One of these is its portability, as mentioned earlier. One widely held opinion among its adherents, however, is that the most important thing that has kept UNIX on the cutting edge, when most other software that old is considered obsolete, is its design philosophy dictating how an operating system should work.
Many people tend to think of UNIX as an extremely complicated, austere, and confusing operating system. But to seasoned users, UNIX is the ultimate example of the KISS (Keep It Simple, Stupid) credo of software engineering. This enables savvy users to perform very complex tasks with rudimentary tools, as long as they tie together the right way. The UNIX design philosophy is that every task should have its own small software program that performs that one task and does it well. But the designers of UNIX had a brilliant idea that these programs should be able to be combined together by the user to do things that a single program could not do by itself.
Note This combination concept is known as piping. Doug McIlroy of Bell Labs is credited with coming up with the idea. Ken Thompson implemented it in UNIX.Here is an example of the way these "pipes" of data processing programs work. Suppose that you have a plain-text file that serves as a simple address book. It uses one line per person and contains names, addresses, phone numbers, email addresses, and so on. Fields in this file are separated by a tilde (~), a character unlikely to be used in any of the data fields. A few sample lines from the file might look like these:
Doe, John~505 Some Street~Anytown~NY~55555~505-555-1212~jdoe@email.com
Doe, Jane~121 Any Street~Sometown~NY~12121~121-555-1212~jadoe@isp.com
Bar, Foo~501 Some Street~Anytown~NY~5555~505-123-4567~foobar@email.com
This file could contain 50 names or 500 names it really doesn't matter. You want to be able to mine and rearrange the data in the file to generate several different results:
- to get a list of all the people that live in Anytown;
- to get just their names and phone numbers;
- o sort the list alphabetically; and
- to print out a hard copy of the list.
$ awk 'BEGIN {FS="~"} $3 == "Anytown" {print "%s\t%s\n",$1,$6}'\
address.txt |sort |lp
Don't worry if you don't understand exactly what this code does; In simple terms, the code
- sets the field separator to the tilde,
- selects lines where the third field (the field that contains the city name) is equal to Anytown, and
- then prints the first and sixth fields (the name and phone number) of these lines, separated by tabs (\t), with a newline at the end of each line (\n).
- The file it gets the information from is address.txt.
- The output is then piped to the sort command, which sorts it in alphabetical order.
- It is then piped to the lp command, which will print the output on the default printer. Here is what the output looks like using our simple three-record data file:
Bar, Foo 505-123-4567
Doe, John 505-555-1212
Although this command string may seem somewhat arcane to a novice, a UNIX user with only a little bit of experience can decode it easily and tell what it's meant to do. The single line of code shown here creates a simple database that, with a few judicious modifications, can be made to search by any field and present output in any form you want.
Just so you can see how powerful this single line of code can be, here is a second example that modifies the previous example slightly to print a simple mailing list:
$ awk 'BEGIN {FS="~"} $3 == "Anytown"\
{printf "%s\n%s\n$s, $s $s\n\n",$1,$2,$3,$4,$5}' address.txt |lp
The output of the preceding code is as follows:
Doe, John
505 Some Street
Anytown, NY 55555

Bar, Foo
501 Some Street
Anytown, NY 55555
Being able to reduce complex functions like these to a single command line is critical to writing shell programs; with just a few lines made up of these rudimentary UNIX commands, you can create deceptively simple scripts that perform very useful tasks, and which you can modify to suit any need. For those who are willing to learn, UNIX is about as close to an infinitely customizable and flexible operating system as you can get. Immense power is locked up inside UNIX (and therefore FreeBSD) that can be unleashed and used to do things for free that you might expect to require expensive, dedicated software.
It is the flexibility of this timeless design philosophy, retaining its usefulness no matter how fast computer hardware becomes or how complex desktop GUIs get, that has kept UNIX relevant, unlike so many other software efforts over the years.
How FreeBSD Compares to Other Operating Systems
When determining how FreeBSD compares to other operating systems, it's important to consider the mainstream desktop operating systems such as Windows XP and Mac OS X, as well as FreeBSD's chief open-source rival, Linux. Don't forget that's only a (i hope possibly objective) point of view not a religious war
Windows XP
Microsoft has done a good job of listening to what its customers want in an operating system.
- Windows XP doesn't allow you to "get under the hood" much. It is designed to work reasonably well for a wide variety of tasks without the user having to learn about the internals of the system. It does this, however, at the expense of some raw performance, efficiency, and especially flexibility.
- Windows XP has relatively steep hardware requirements, but many users are willing to accept this in exchange for ease of use, especially with the ever-plummeting costs of new computer hardware.
- In addition, because of the graphical design of Windows, "power users" can easily hit limits. There is only so much that can be done from a graphical user interface the user is limited to what buttons and controls are available in the software. The following list outlines some of the important differences between FreeBSD and Windows:
- The Windows kernel cannot be customized. The kernel is the core of the operating system; it controls virtually every other aspect of how the system works. FreeBSD allows you to build a new kernel for the operating system that is customized for your specific system, enabling only the features and device drivers that you need, or adding driver support for newly developed devices. This can increase performance and reduce memory usage, as well as keep you from being at the mercy of official driver makers. Windows XP does not allow you to rebuild or customize the kernel. This is one of the areas where Windows XP sacrifices some efficiency and performance for ease of use.
- Windows XP uses a GUI (graphical user interface) for almost all tasks, whereas FreeBSD relies much more on the command line. The GUI in Windows XP is laid out so that things are easy to find and common tasks are easy to perform. For example, setting up a network in Windows XP is done from a network control panel, and there are "wizards" that walk you through the process. FreeBSD, on the other hand, uses text-based configuration files for network configuration. Setting up the network involves editing one or more configuration files by hand. FreeBSD's philosophy means you're much more free to mess things up than in the regimented Windows interface, but it also means there is no Registry to corrupt, and configuration changes can be backed out using simple version control systems (such as CVS, SVN, bazaar, git etc) or merely with a text editor.
- The Windows XP GUI is always running; the GUI in FreeBSD is optional. Although a GUI can make a workstation easier to use, it is wasteful on a backroom server because no one ever sees its screen anyway (and it can lead to security vulnerabilities as well). FreeBSD gives you the option of turning off the GUI or not using it at all. If you do choose to use a GUI, a wide variety of desktop environments GNOME, KDE, and many others give you great flexibility in tuning your GUI to your needs.
- Windows requires special software for remote administration. Because everything in FreeBSD can be done from the command line, it is very easy to administer remotely you can connect to the command line shell using SSH and exchange simple text commands to control the computer. In FreeBSD, all system-administration tasks can be done from the command line. This makes remote administration easy. It can be done from any terminal even a terminal that cannot display graphics. It can also be done from any type of system that is capable of running a terminal emulator. FreeBSD can be administered from another UNIX-like system, Windows system, Macintosh, and so on. Windows XP, on the other hand, requires the use of the GUI, and accessing a Windows system remotely requires that you install special remote client software and perform graphics-intensive operations that involve moving windows and mouse pointers on the remote system. Most remote administration tasks for Windows can be done only from a Windows machine or Macintosh with the Remote Desktop client installed, or from Linux or FreeBSD using the rdesktop package.
- By nature, any GUI (including that of Windows XP) has limits that are not present in a command-line interface. A GUI is a user interface layer that exists at a high level, far separated from the kernel, and constrained by what features are designed into it. Only so many features can be crammed into a GUI. Sooner or later, a "power user" will want to do something that the operating system designers didn't consider. For example, the simple address book database demonstrated in the previous section could not be done with the software that is included with Windows. A similar system would require third-party software in Windows. The mailing list example could not be done with the software included with Windows, either. Using the textual command-line interface (CLI) in FreeBSD, where your commands are executed much closer to the kernel level, your flexibility and power is much greater than in a GUI-based system.
Mac OS X
Apple's graphical operating system, Mac OS X, serves much the same purpose as Windows XP it occupies the same niche in the computing world, with prescribed workflows designed into the graphical layout in a way that most agree is more intuitive and user-friendly than in Windows (it is, after all, Apple's claim to fame).
It thus involves all the same advantages and sacrifices that Windows does, including the non-customizable kernel and the omnipresent, heavy GUI. It's also encumbered by requiring proprietary hardware on which to run, something that's anathema to FreeBSD.
However, Mac OS X can also be thought of as a hybrid operating system, falling somewhere between Windows and FreeBSD. Mac OS X is based on a true UNIX architecture, with a remotely accessible command-line interface that can be driven as usefully from a remote Windows or UNIX machine as the command-line shell of FreeBSD.
Mac OS X is in fact based on NeXTSTEP, the operating system of Steve Jobs' company NeXT, which he based on 4.4BSD the same code base that contributed much of its architecture to FreeBSD itself. If you're familiar with the plumbing underneath the pretty GUI of a Mac, you're already largely familiar with FreeBSD.
Mac OS X includes many things that aren’t at all necessary for an Internet server, and it only runs on Apple hardware, so I don’t recommend it as an inexpensive general-purpose server.
What’s more, code goes both ways. FreeBSD has incorporated code originally developed for Mac OS X. And while you cannot view the user interface source code for Mac OS X, you can get the source code to its BSD core and Mach kernel. Apple has released both under the code name Darwin.
Linux
You have certainly at least heard of Linux, even if you don't know what it is. Linux is a work-alike clone of UNIX that has become extraordinarily popular in recent years. Like FreeBSD, it is open-source and developed by volunteers. Unlike FreeBSD, there is no single controlling authority for Linux, and there are well a lot different distributions of it. More similarities than differences exist between FreeBSD and Linux. Both are excellent, multipurpose operating systems, and both can serve the needs of most users quite well.
Although more software is available for Linux than for FreeBSD, FreeBSD can run almost all Linux software that is available, so compatibility is not really an issue. When running Linux software under FreeBSD, performance rarely suffers in fact, FreeBSD actually runs some Linux software faster than Linux itself does. Here are some of the most important differences between FreeBSD and Linux:
- FreeBSD has only one distribution, whereas Linux has a lot of distributions. FreeBSD will work the same way on all systems in which it is installed. This is not true with Linux. Each Linux distribution has a slightly different way of doing things. For example, Slackware Linux uses BSD-type run control(rc) scripts, which control how various services are launched at startup. Debian Linux uses Sys V run control(rc) scripts in a different architecture than the BSD-style scripts; Red Hat Linux uses Sys V run control scripts but stores them in a different location than standard Sys V UNIX does. This can be confusing for users who move from one distribution of Linux to another because things may not work the same way from one distribution to the next. (The same argument can be made with FreeBSD versus NetBSD and OpenBSD, but the differences between these "flavors" of BSD UNIX are arguably more fundamental and significant than between the various distributions of Linux.)
- FreeBSD is a complete operating system maintained by a core team; Linux is a kernel maintained by Linus Torvalds. Linux is not a complete operating system. It is a kernel. As mentioned in the section on Windows, the kernel is the core of the operating system. It controls the flow of data through the system, managing device drivers and networking, and keeping the system running while you run your applications in the foreground. The various companies that sell Linux distributions take the Linux kernel and package it with a bunch of other programs designed to work with Linux. Because each company has its own idea about what should be included in a distribution, you may find that a program you had available on one Linux system does not exist on another Linux system (although you could download and install it). This fact can also cause dependency problems when upgrading Linux. For example, you may upgrade your Linux kernel, only to find out that you need to upgrade several other packages as well, and in the meantime your system might not even boot. Because FreeBSD is a complete operating system, upgrades are generally easier to do because any dependencies are upgraded at the same time.
- Development of Linux by its distribution organizations leads to many parallel code bases; contributions to FreeBSD are part of a single development effort. Although anyone can contribute to the FreeBSD project, such contributions can take place anywhere in the operating system. In Linux, kernel code changes must be approved by Linus Torvalds, but contributions elsewhere in the system become part of one distribution or another. Contributions to the FreeBSD source code need to be approved by the core team of committers (programmers who are part of the central FreeBSD development effort) before they will be merged into FreeBSD. This is good for most users because you can be sure that the code has been checked for problems by people who know what they are doing. It also helps to ensure that the code will not cause problems with other code that already exists. This is a common problem with Linux, which is why many Linux distributions seem to come with at least some part "broken" out of the box. Because there is only one base of FreeBSD code (commonly known as a source tree), this is far less of a problem with FreeBSD.
- GPL-license Vs BSD-license The guiding principles of the Linux project are embodied in the GPL (GNU General Public License), which states, in part, that any code developed under it must be made freely available to the public. This extends to commercial software development entities, which must rerelease any software that they develop from GPL-licensed materials as freely available source code(that concept is extendend in GPLv3). If there is any single strong point of contention between the supporters of open-source and those of commercial software, it is this seemingly innocent license. The problem is that many companies are unwilling to abide by its terms because, to them, giving away the source code that they develop is tantamount to publishing trade secrets. GPL-based software embodies an ideal: the notion of software written by the people, for the people, owned by nobody, and leveraged by everybody. It is the antithesis of commercial, closed-source software sold in compiled, executable form from only one supplier. Linux adheres to that ideal in a number of important ways, but the unattractiveness of the spirit of the GPL to business has caused many companies to decide against basing software on it. It is here, where the open-source ideal meets the market forces that drive the technology industry, that FreeBSD's advantages become clear.FreeBSD comes from a different open-source tradition than Linux does. It is not based on software developed under the GPL, but instead favors the BSD (Berkeley Software Design) open-source license that allows code originally developed at the University of California at Berkeley (and later commercially) to be reused in software development, whether or not the source is published. This is part of the reason why Steve Jobs' company, NeXT, chose the BSD operating system to form the core of the NeXTSTEP platform that later evolved into Mac OS X. Similarly, when Microsoft made overtures to the academic community in 2002 by releasing a programming environment for its C# language, it made it available on two operating systems: Windows and FreeBSD. The BSD license, lacking the requirement for developers to publish the "keys to the kingdom," is friendlier to commercial software companies than the GPL. It strikes a balance that encourages grass-roots contributions from users, but does not place undue restrictions on companies. This makes the companies more likely to use their resources to develop BSD-licensed software into truly great products.
There is a tradeoff here. Do you want stability for a production environment? Or do you want the latest gizmos and gadgets to play with at the expense of performance and stability?
The popular BSD "Beastie" mascot artwork, © Kirk McKusick. In what should amuse animation fans, Pixar's John Lasseter drew this and several other renditions of Beastie. So why is it a devil? The short answer is that it's not a devil it's a daemon. Daemons are the background processes that handle all automated tasks the system needs done. Daemons are actually wonderfully helpful things. If you've ever sent an email or visited a web page, you have used the services of a daemon without even knowing it. Windows XP also has daemons; they just aren't called that. Microsoft calls them "services" instead. Many observers of the BSD Daemon mascot carry the metaphor further and insist that the character's trident, or fork, is intended as a reference to the ability of the operating system to fork new processes, which means to create carbon copies of running processes so as to handle new requests, such as a new Apache process to serve a web surfer's demand for a web page, while still leaving Apache running and able to handle incoming requests from other visitors at the same time.
NetBSD
NetBSD's claim to fame is the sheer number of platforms that it runs on. NetBSD has been ported to everything from PDAs to high-end SPARC and Alpha servers, to gaming consoles such as the Sony PS2. It also, of course, runs on the standard x86 hardware found in most PCs. NetBSD and FreeBSD share developers and code.
The main drawbacks of NetBSD are that it is not as user-friendly as FreeBSD or as aggressively developed, and it doesn't have the number of applications ported to it that FreeBSD does. Because of this, new users who have x86 hardware are probably better off with FreeBSD.
OpenBSD
OpenBSD branched off from NetBSD in 1996 with the goal of becoming the most secure BSD.
OpenBSD was the first to support hardware-accelerated cryptography, and its developers are rightfully proud of the fact that their default installation was largely immune to remote exploits for several years.
The OpenBSD team has contributed several valuable pieces of software to the world, the most notable being the OpenSSH suite used by almost every operating system and hardware vendor today.
So OpenBSD's main selling point is its security. Although much of this security comes from the default configuration, which can be mimicked in FreeBSD, some of it comes from unique OpenBSD features, such as the ability to encrypt the swap file (the region of the disk used for virtual memory). However, like NetBSD, OpenBSD is not nearly as userfriendly as FreeBSD, and it also doesn't have nearly the number of ported applications that FreeBSD has. Again, this is a result of the security-conscious focus of OpenBSD, which actively avoids incorporating superfluous features for fear of exposing security weaknesses.
So once again, new users with x86 hardware who want the widest choice of applications and features are probably better off with FreeBSD.
Installing FreeBSD
Before you can use FreeBSD, you need to install it on your system's hard disk, just as you would install Windows (or latest Linux distros) or any other operating system.FreeBSD's installation procedure is more complex (There are so many different ways to get FreeBSD installed that we will only gloss over DVD's .iso way) and requires a bit more attention to detail than the average Windows/Linux installation, but following the procedure outlined here should get you through it without any mishaps.
Depending on how fast your system and your optical drive run, the installation process will take anywhere from about 20 minutes to an hour or moreover, if you're installing over the network, several hours. Most of this time is spent copying files, so you will not always need to be sitting in front of your computer.There are considerably more things that can go wrong in a FreeBSD installation than you might be used to in installing Windows/Linux, and it pays to know in advance what kind of information to give the installer and what the computer will be used for in its work environment. Here's a strict official installation guide
Firstmost look over the hardware compatibility list to make sure your hardware is supported. You won't want to continue the install if you find out a key piece of hardware in your system is not supported by FreeBSD.
Checking Your Hardware
I’m assuming that you want to run FreeBSD in the real world, doing real work, in a real environment. This environment might even be your laptop—while you might argue that your laptop isn’t a real production system, I challenge you to erase all the data on it without backing it up and tell me that again. If you’re just using a test machine that you truly don’t care about, then I still recommend following the best practices so that you develop good habits.
Consider what hardware you need or have. Then, decide how to best use that hardware, what parts of FreeBSD you need to install, and how to divide your hard disk. Only after all of that can you actually boot your computer and install FreeBSD. Finally, do some brief post-install setup, and your system is ready to go!
FreeBSD supports a lot of different hardware, including both different architectures and devices for each architecture. One of the project’s goals is to support the most widely available hardware, and the list of that hardware has broadened over the last few years to include far more than the “personal computer.” Today, the supported hardware includes:
- amd64 AMD’s 64-bit extensions to the 32-bit i386, copied by Intel as EM64T, and sometimes called x64. This hardware can run both the 32-bit i386 and 64-bit amd64 versions of FreeBSD. (Linux calls this the x 86-64 platform.)
- i386 The good old-fashioned Intel-compatible personal computer.
- powerpc The PowerPC processor found in older Apple computers and many embedded devices.
- pc98 Similar to i386, but popular in Japan.
- sparc64 Used in high-end servers from Sun Microsystems.
- xbox Yes, FreeBSD can run on Microsoft’s Xbox.
SCSI is SCSI anywhere, and an Intel Ethernet card doesn’t become magically
different just by putting it in a sparc64 machine.
For the most part, FreeBSD doesn’t care about the supporting hardware so long as it works. Most readers are primarily familiar with the i386 architecture, so that’s where we’ll spend a fair amount of time. The amd64 platform is quickly becoming popular, however, so we’ll touch on that, as well as sparc64.
FreeBSD has been ported to a variety of other platforms, such as the ARM architecture and Intel’s Itanium. These ports are either incomplete or of little utility to anyone except a developer. While it’s nifty that many ARM boards run FreeBSD, you can’t go to a computer shop and buy one to play with.
Although FreeBSD runs just fine on ancient hardware, that hardware must be in acceptable condition. If your old Pentium crashes because it has bad RAM, using FreeBSD won’t stop the crashes.
I S M Y H AR D W AR E S U P P O RT ED ?The easiest way to tell if your particular hardware is supported is to check the release notes for the release of FreeBSD you plan to install. The release notes are available at freebsd.org.
Proprietary Hardware
Some hardware vendors believe that keeping their hardware interfaces secret prevents competitors from copying their designs and breaking into their market.
This has generally been proven to be a bad idea, especially as the flood of generic parts has largely trampled these secretive hardware manufacturers over the last few years. Yet a few vendors, especially video and sound card makers, still cling to this strategy.
Developing device drivers for a piece of hardware without its interface specifications is quite difficult. Some hardware can be well-supported without full documentation and is common enough to make struggling through this lack of documentation worthwhile. The FreeBSD sound driver team, in particular, has done an excellent job of reverse-engineering sound cards’ interfaces and now provides generic sound card infrastructure that works well even for poorly documented cards. Other hardware, such as the chipset used on the PCI bus in Sun UltraSPARC III systems, cannot be supported without full and complete documentation.
If a FreeBSD developer has specifications for a piece of hardware andSome hardware vendors provide closed-source binary drivers for their hardware. For example, Nvidia offers a binary-only driver for their video hardware. FreeBSD also employs some clever tricks to use Windows network drivers, notably those for the wireless Ethernet cards supported by “Project Evil” (implementing the Windows kernel interface in the FreeBSD kernel)
interest in that hardware, he’ll probably implement support for it. If not, that hardware won’t work with FreeBSD. In most cases, unsupported proprietary hardware can be replaced with less expensive and more open options.
For the most part, however, the best support comes from open-source FreeBSD drivers.
Hardware Requirements
While FreeBSD has minuscule hardware requirements, you’ll get the best results out of it if you give it enough to work with. The following recommendations are for i386 systems, but other platforms have similar requirements.
- Processor Your brand of CPU is irrelevant. FreeBSD doesn’t care if you’re running an Intel, AMD, IBM, or Cyrix/Via CPU. During the boot process, the FreeBSD kernel probes the CPU and uses whatever chip features it finds. I’ve run effective servers on 486 machines before—in fact, I’ve filled an Internet T1 with a 486. For you folks who are just learning, I recommend that you get a Pentium or faster system. Some of the techniques in this book take days on a 486, and I’m no longer that patient. Those same operations take less than an hour on my dual-core laptop.
- Memory Memory (as in RAM) is good. Adding more RAM accelerates a system better than anything else. I recommend at least 64MB of RAM, but if you have asystem with 256MB or greater you’ll find FreeBSD easier going. If you are really trying to shrink your system, you can run a carefully crafted kernel in 16MB—but you can’t run the installer in that amount of memory.
- Hard Drives Hard drives can be a big performance bottleneck. While IDE drives are dirt cheap, they don’t perform as well as SAS, SCSI, or even SATA drives. A SAS or old-fashioned SCSI system transfers data to and from each drive at the full controller speed, while IDE and SATA drives split their throughput between all of the drives on the channel. A SCSI controller can have up to 15 drives on a channel, while a standard IDE controller can have no more than 2.
SATA controllers tend to put only one drive on a channel, taking the easy route to good throughput. While you can use splitters to attach more than one drive to a SATA channel, multiple SATA drives on a single channel have no greater throughput than a single drive. 15 drives, each running at full speed, versus 2 drives averaging half speed, make a huge difference in the amount of data throughput!
If you have IDE or SATA drives, put your hard disks on separate controllers if possible. Many systems now have a hard drive on one IDE controller and a CD drive on the other. When you add a second hard drive, put it on the same controller as the CD drive. Most likely, you won’t be using the CD nearly as often as the hard drive, and this way each drive will have a dedicated controller.
The base FreeBSD system can fit into 500MB, and stripped-down versions can fit into 32MB. You’ll be happiest with at least 5GB of disk space on your test system, although I’m assuming that you have at least 10GB. Some add-on software requires far more disk space—building the OpenOffice.org suite, for example, takes 10GB of /usr all on its own! Again, any hard drive new enough to be workable will probably be at least that large.
Preinstall Decisions
Before installing your server, decide what you’ll use it for. Is this a web server?
Database server? Network logging server?
Partitioning
Partitions are logical divisions of a hard drive. FreeBSD can handle different partitions in different ways, and can even allow different filesystems or different operating systems on different partitions.
If you’re doing your first FreeBSD install, and you really don’t know how you want to partition your disk, you can just use the automated partitioning suggested by the installer.If you have more complicated needs, I suggest that you write down your
desired partitioning on a piece of paper before you begin.
Partitioning might seem like a pain. If you’re familiar with some other Unix-like operating systems, such as some distributions of Linux, you might want to create a single large root partition and put everything on it. If Windows or Linux let you dump everything on one big disk, why divide your FreeBSD disk into smaller, less flexible pieces? What are the advantages of partitioning?
- On a physical level, different parts of the disk move at different speeds. By putting frequently accessed data on the fastest parts of the disk, you optimize system performance. The only way to arrange this is by using partitions.
- On a logical level, FreeBSD handles each partition separately. This means that you can set each partition to have different operating rules. Partitions that contain user data should not have setuid programs (programs that run as root), and you might not want them to have programs at all. You can enforce that easily with partitions.
- If the disk is damaged, chances are the damage is limited to a single partition. You can boot the system from an intact partition and attempt to recover data from the damaged partition. With a single large partition, any damage to that partition becomes damage to your entire system, reducing or eliminating chances of recovery.
- Partitions can limit problems caused by poor system administration. Unattended programs can completely fill a hard drive with logs. Larger hard drives don’t mean that the problem takes longer to show up; they just mean that software writes more logs. A full hard drive can even prevent you from connecting to the system to fix the problem! Partitioning confines such problems to a subset of the system.
- Finally, many backup programs—i.e., dump(8)—work at the partition level. On a production system, you’ll want to set different backup strategies for different types of data.
Other Partitions
Experienced system administrators always have their favorite partitions; also, some companies have standards on how systems should be partitioned. Different Unix vendors have attempted to impose their partitioning standards on the world. You’ll see partitions like /opt and /u1 on different Unix systems. If you have a preferred partitioning scheme, use it. You can steer FreeBSD to install add-on software in a different partition if you like. Or, you can have users’ home directories in /gerbil if it makes you happy. The best advice I have to offer to readers whom I’ll never meet and whose systems I will never log on to is this: You are the one who must live with your partitioning, so think first!
Multiple Hard Drives
If you have more than one hard drive of comparable quality, and you are not using them for RAID, you can still make excellent use of them:
- Put your data on one hard drive and the operating system on another.
- One of your partitions will contain the information that makes your server special. Database servers store their data in /var, so put /var on its own hard drive. If it’s a web server, put /usr on the second hard drive.
- If you have a special function for this server, consider making a private partition just for that function. There’s nothing wrong with creating a /home, /www, or /data partition on the second hard drive and dedicating that entire drive to the system’s primary purpose.
With multiple hard drives, you can improve the efficiency of your swap space by splitting it amongst the drives. Put the first swap partition on the second slot of the drive with your root partition, and the other swap partitions on the first slots of the other drives.
This splits reads and writes among multiple disk controllers and thus gives you some redundancy at the controller level. Remember, however, that a crash dump must fit entirely within a single swap partition.For swap splitting to work best, however, the drives must be SAS or SCSI.
If you have IDE or SATA drives, they must be on different IDE controllers for best results.
Remember that each IDE controller splits its total data throughput among all the hard drives connected to it. If you have two hard drives on the same IDE controller and you’re accessing both drives simultaneously, each disk works, on average, only half as fast as it would work alone on the same channel. The major bottleneck in using swap space is disk speed, and you won’t gain anything by creating contention on your IDE bus.Another option is to gain some resiliency by implementing a software-based RAID. This provides protection against a hard drive failure by sharing and mirroring the data amongst multiple hard drives.
Your slices on each drive must be of identical size to use software RAID. This is easiest to accomplish if all your drives are the same size, but that’s not strictly necessary.
Partition Block Size
This section describes options that can really impair system performance. If you’re new to FreeBSD, read this section only for your information—don’t
actually try it! This is for experienced Unix administrators who know exactly what they’re doing, or at least know enough to be leery of the whole topic.
Block size refers to the size of the filesystem building blocks used to store files. Each block can be divided into fragments. FreeBSD defaults to 16KB block sizes (16,384 bytes) and 2KB (2,048 bytes) fragments. Files use a combination of fragments and blocks. For example, a 15KB file would be assigned to one block, while a 17KB file would be assigned to one block and one fragment. If you know exactly what you’re doing, and you want to change the block size, you can do that in the installer.
Be warned that FreeBSD behaves optimally if each block contains eight fragments; you can choose ratios other than 1:8 but only at a performance cost.
Choosing Your Distribution(s)
A distribution is a particular subset of FreeBSD. You’ll choose one or more distributions during the installation process. While you can add pieces later, it’s best and easiest just to make the right choice in the beginning. The installer offers nine distribution sets:
- All This contains absolutely everything that is considered part of FreeBSD, including the X Window System. (FreeBSD uses the X.org implentation of X.) If this is a test machine, definitely choose this option.
- Developer This includes everything except the games and X.
- X-Developer This includes everything except the games.
- Kern-Developer This includes the FreeBSD programs and documentation, but only the kernel source code.
- X-Kern-Developer This is the Kern-Developer distribution plus the X Window System.
- User This includes the FreeBSD operating system programs and documentation only—no source code, no X.
- X-User This is the User distribution plus X.
- Minimal This contains only the core FreeBSD programs, without documentation or source code of any sort. This is a good choice if your disk is really, really small.
- Custom Define your own distribution set.
Games?
Yes, FreeBSD includes very simple games. These are small, text-based games that were typical on systems of 20 years ago. New users will find the FreeBSD tips provided by fortune(6) useful, but if you want to play modern games look in /usr/ports/games.
The FreeBSD FTP Site
Just as the main source of information about FreeBSD is the FreeBSD website, the main source of FreeBSD itself is the FreeBSD FTP server. You can purchase CDs of FreeBSD, and while they’re a decent investment, many people prefer to just use the Internet to grab what they need. Even if you have a CD, you’ll interact with the FTP servers eventually.
The primary FreeBSD FTP server is ftp.freebsd.org, but many servers mirror it to reduce the load on the primary server and provide speedy, reliable access.
You’ll find a comprehensive list of FreeBSD FTP servers, although you can also pick mirrors easily enough without the list. Every mirror server has a name following this pattern:
ftpThe country code is optional; if there’s no country code, it’s usually assumed to be in the continental United States. For example, we have ftp14.freebsd.org, ftp2.uk.freebsd.org, ftp5.ru.freebsd.org, and so on.. freebsd.org
As a rule, the FTP mirrors with lower numbers are more heavily loaded than those with higher numbers. Try a site around ftp12.freebsd.org, or some high-numbered server under your country code, to see if you can get a speedy connection.
FTP Server Content
Many FreeBSD mirrors also mirror other software, but all FreeBSD content can be found under /pub/FreeBSD. While the contents of the FTP server vary over time, let’s take a look at the important files found there:
CERTFortunately, you don’t have to dig through all this to get everything you need to install, but a few directories merit particular attention:
ERRATA
ISO-IMAGES-amd64
ISO-IMAGES-i386
ISO-IMAGES-ia64
ISO-IMAGES-pc98
ISO-IMAGES-ppc
ISO-IMAGES-sparc64
README.TXT
distfiles
doc
ports
releases
snapshots
tools
torrents
- CERT This directory contains all FreeBSD security advisories since the project’s inception.
- ERRATA This directory contains all errata for different releases of FreeBSD.
- ISO-IMAGES All of the directories that begin with ISO-IMAGES contain CD disc images for different architectures of FreeBSD. For example, ISO-IMAGES-i386 contains ISO images for installing FreeBSD on the i386 architecture. You can burn these images to CD to perform a CD install.
- README.TXT These are the various subdirectories on the FTP site and their contents. You might want to consult this file for the changes
- distfiles This directory contains quite a few source code and binary files for the many third-party applications that run on FreeBSD. This is definitely the largest directory on the FreeBSD.org FTP server; don’t just download everything here or your hard drive might burst.
- doc This directory contains the latest set of FreeBSD documentation, subdivided by language. If you’re reading this book in English, you prob- ably want the en (English) subdirectory. You’ll find all the articles and books there in a variety of formats, compressed for easy downloading.
- ports Within this directory you’ll find all the infrastructure and packages for the ports system
- releases This directory contains the most recent versions of FreeBSD released along each development track. Older versions can be found on the server ftp-archive.freebsd.org.
- snapshots This directory contains recent versions of FreeBSD-current and FreeBSD-stable. This is where you’ll find the latest testing release of the bleeding-edge and production versions of FreeBSD.
- tools Here you’ll find various Windows programs that can be used to prepare a multiboot system to run FreeBSD.
- torrents BitTorrent users will find this directory useful; it contains torrent seeds for the most recent release(s) of FreeBSD. (If you don’t use BitTorrent yet, you should check it out.)
The Install Process
Any OS installation process has three parts:
- booting the installer program,
- accessing the installation media, and
- copying the software onto the hard drive.
Choosing Boot Media
if you have a system that boots from CD, this is probably the easiest way to go. You can get FreeBSD CDs from a variety of vendors or from the FTP site.
Make sure that your computer’s BIOS is set to boot from CD before the hard disk and reboot your computer with the FreeBSD disc in the CD drive.If your computer cannot boot from CD but can boot from floppy disk, download floppy disk images from the Internet and boot from those. Many older computers have CD drives that will not work as boot devices, but once the system is running you can use them for installation media.
Some modern computers have neither a floppy disk nor a CD drive. This is often the case with small rackmount servers, where space is expensive. With such a system, you can either install a CD drive or use PXE installation(PXE installation requires bootstrapping from an existing FreeBSD machine, however)
Choosing Installation Media
The two most common sources of installation media are CD and FTP. CDs are great when you have many machines to install and these machines have CD drives. They’re fast and easy, and work even if the network is down.
A variety of vendors produce FreeBSD CDs and DVDs. iX Systems, in particular, has supported FreeBSD for many years, and recently purchased FreeBSD Mall, the original producer of FreeBSD CDs. The DVD sets have far more content, including many files that can be downloaded separately from the Internet, but the CD sets have everything you truly need. Everything that applies to a CD is also true of a DVD. If you don’t want to purchase a CD, you can fetch an ISO image from the FreeBSD FTP server and burn it to CD yourself.
Several dozen FTP servers carry FreeBSD ISO images, installation media, and related materials. The FreeBSD installer can FTP the software directly from these servers. To use the FTP installation method, however, you must have a working Internet connection, and the installation speed will be largely dependent upon the network between you and your chosen FTP server.
There is also a chance that an intruder has hacked into the FTP server and uploaded a bad version of FreeBSD for the unsuspecting public, but the FreeBSD team watches carefully for such events and deals with them swiftly.
The FreeBSD release team also provides cryptographic checksums for every release in the release announcement, which you can use to verify releases.
Preparing Boot Floppies
You will need several floppy disks (four now, but possibly more in the future). Find the release directory for the architecture and version you want to install. You’ll find a floppies subdirectory there. For example, for an i386 system and FreeBSD release 7.0, look here. (You’ll also find this directory in the root directory of a FreeBSD CD.) You’ll find several files with the .flp extension, one named boot.flp and several numbered kernX.flp files, such as kern1.flp and kern2.flp. These files are floppy disk images. Download them all. You need to put these images onto floppy disks. The catch is, you cannot use basic file-level copying, such as drag-and-drop in Windows. An image file must be copied onto the disk in a particular way.
If you’re already running a Unix-like system, the dd(1) command does everything you need. You’ll need to know your floppy drive’s device name, which is probably /dev/fd0, /dev/floppy, or /dev/rfd0. If the device name is /dev/fd0, as it is on BSD systems, you’d enter
# dd if=kern1.flp of=/dev/fd0to write the kern1.flp image to the floppy disk. Copy each disk image to a separate floppy disk.If you’re running Microsoft Windows, you’ll need a special utility to copy disk images. Microsoft doesn’t provide one, but FreeBSD does, and you’ll find it in the tools subdirectory of the main site. It’s called fdimage.exe.
This is a free Windows program to copy disk images, and it’s quite easy to use. It takes only two arguments: the name of the image file and the name of the drive the disk is in. For example, to copy the image boot.flp to the floppy in your a: drive, open a DOS prompt and enter the following:
c:> fdimage boot.flp a:Once the floppy drive finishes churning (which may take a while), repeat the process for all other disk images you have downloaded.FTP Media Setup
If you’re installing from CD, the install media is ready—it’s the same disk you’re booting from. But to do an FTP install, you must choose an FTP server and understand how to connect your machine to the local network.
Choosing an FTP server is half guesswork. Find the list of FTP mirror sites and start pinging them. You’re looking for an FTP server with low ping times—that’s a good sign that it’s fairly accessible from your location. Once you have a couple of candidates, FTP to them from your desktop machine. See how responsive they are. Pick one that feels snappy, and make sure that it has the release you want to install. Take note of the FTP server’s name for use in the install process.
If your local network uses Dynamic Host Configuration Protocol (DHCP) to assign IP addresses and other network information, you’re ready to go.
Otherwise, if your network administrators assign IP addresses by hand, get the following information from them:
- IP address for your FreeBSD system
- Netmask for your FreeBSD system
- IP addresses of nameservers for your network
- IP address of your default gateway
- Proxy server information (if necessary)
Preparing Boot CDs
If you’ve purchased an official FreeBSD CD, your install media is ready. If not, you need to choose an ISO image from the FTP site and burn it. The first step is to find your image directory. Go to the FTP site and choose the ISO image for your architecture. In that directory you’ll find a directory for each current release. For example, ISO images for FreeBSD 7.0 for i386 can be found here. You’ll find multiple images there. The name of an ISO image is composed of the release number, the label RELEASE, the architecture, and a comment, all separated by hyphens. For example, these are the names of the ISO images available for 7.0:
7.0-RELEASE-i386-bootonly.iso
7.0-RELEASE-i386-disc1.iso
7.0-RELEASE-i386-disc2.iso
- The image labeled disc1 contains the entire FreeBSD distribution, the X Window System, a few basic packages, and a live filesystem that can be used to perform repairs when your server goes bad.
- The image labeled disc2 contains the most popular pieces of software for FreeBSD precompiled and ready for use with this release.
- The bootonly image boots the FreeBSD installer so that you can do an FTP install.
Once you’ve chosen your image, burn it to CD. CD burning methods vary widely among operating systems; even within the Unix-like world, different operating systems have chosen different ways to burn CDs. On Windows,
many CD burning programs are available, such as Nero and Stomp. Here’s
how you would burn an image to disc on a FreeBSD system with a standard
IDE CD burner:
# burncd -f /dev/acd0 data imagename fixateCheck your operating system’s instructions on burning an image file to physical media.Be sure to burn this file as an image, not as a regular file.
One clear hint that you’re doing it wrong is if your burning software complains that the file won’t fit on a single CD. The image file will overflow a single CD if you’re burning it as a regular file, but not if you burn it as an image.
Navigating the Sysinstall Program


Starting the Install Process

- In the first place you must see Select Country (The default country is the United States).

- if you want change keyboard map (per default associated with select country) select Keymap from the menu then select the keyboard map tou want(i.e. Italian) and press Enter

- Select Install Type. To install, select: Standard (recommended), Express (quick install for experts), or Custom (custom install for experts). This procedure describes the Standard install.
After you select the Standard option, a message will inform you that you need to set up a DOS-style (fdisk) partitioning scheme for your hard disk. After you read this message, simply press Enter to continue.
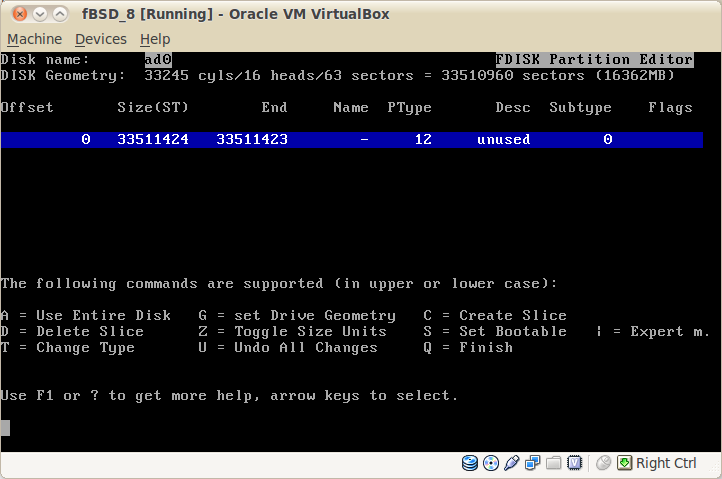
- Disk Partitioning. The installer provides you with a screen-oriented FDISK to partition your hard drive.Assuming you want to use the whole hard disk to install FreeBSD, use arrow keys to highlight any old slice and type D to delete it. Then you can select one of the following ways of partitioning the disk:
- A: Use the entire hard disk for FreeBSD. This selection leaves space at the beginning of the slice so you can add a boot manager in the future. If you want to be able to install and boot multiple operating systems from the local computer, adding a boot manager (such as LILO or GRUB) will let you do that. Use this on multi-boot and home PCs. I recommend you the first time select the A option
- C: Highlight any unused space and type C to create a new slice(In FreeBSD, you can assign part or all of a hard disk to a slice, then
divide that slice into smaller areas (multiple file systems and swap areas) within that slice. You can do this using the Label Editor). You can create several slices in this way. - Finally select Q to continue.
Creating Partitions and Assigning Mount Points
At this point, one of two things will happen:
- If you have only one hard disk in your system, you will be placed directly into the FreeBSD Partition Editor. In this case, you can skip the next section, "Selecting Hard Disks," and continue with "Partitioning the Disk(s)."
- If you have more than one hard disk in your system, you will be given a menu to select on which hard disk or disks you want to install FreeBSD. If this is the case, read the next section, "Selecting Hard Disks."
Caution: Creating partitions and assigning mount points are areas in which a mistake can cause the loss of all data on your hard disk. If your hard disk contains anything you want to keep, make sure you back it up first.
FreeBSD's Disk nomenclature
- ad0: The first physical hard disk on the system (the name ad stands for ATA Disk). This is the master drive on the primary IDE controller. If you have DOS or Windows installed on your system, it will be located on this drive.
- da0: Similar to ad0, except that it indicates an SCSI disk (the name da stands for "Direct Access") instead of an ATA disk. Once again, this would be the first SCSI disk on your system. If you have only SCSI drives on your system and you have DOS or Windows installed, it will be located on this drive.
- ad1: The second ATA disk on the system. Depending on how your system is set up, this can be either a slave disk on the primary controller or a primary disk on the secondary controller.
- da1 The second SCSI disk on the system.
- Moreover you might also have ad2 and ad3 (or da2, da3 and so on) in your list. Just remember that the number represents the number of the drive in your system and that FreeBSD starts numbering the drives at zero instead of one.
- When you select a disk from this menu, you are placed in the FreeBSD Partition Editor, where you can edit the partition table for that disk.
- After you finish editing the partition table and leave the Partition Editor, you are placed back at the earlier menu and you can then select another disk to edit or press Enter to leave the menu and continue with the installation.
- After you finish editing disks, you are placed into the FreeBSD Disk Label Editor
Caution If you're going to install FreeBSD on a second hard disk,or you have another operating system on the first hard disk, and you don't plan to make any changes to the first hard disk, you need to install a boot manager so that you can choose which operating system you want to boot at system startup. FreeBSD will give you the option of installing the boot manager later in the process. However, the boot manager must be installed on the first disk in your system. In order for this to happen, you must select the first drive in this menu.
If you do not want to make any changes to the first disk, simply select it in the menu and then exit the Partition Editor without making any changes to the disk. You can then select a different disk in the menu and partition it for use with FreeBSD. This allows FreeBSD to install the boot manager on the first disk. If you do not do this, the boot manager will not be installed on the first disk, and you will not be able to boot FreeBSD after the installation is finished.
Partitioning the Disk(s)
Here is what the Partition Editor looks like:
Disk name:      ad0                                    FDISK Partition Editor
DISK Geometry:  29795 cyls/16 heads/63 sectors = 234436482 blocks (113664MB)

Offset       Size(ST)        End     Name  PType       Desc  Subtype    Flags
0         63         62        -     12     unused        0
63   30033297   30033359    ad0s1      8    freebsd      165


The following commands are supported (in upper or lower case):
A = Use Entire Disk   G = set Drive Geometry   C = Create Slice   F = 'DD' mode
D = Delete Slice      Z = Toggle Size Units    S = Set Bootable   | = Wizard m.
T = Change Type       U = Undo All Changes     W = Write Changes

Use F1 or ? to get more help, arrow keys to select.
In this case:- The first line tells you that you are working on the disk ad0, which, as mentioned previously, is the first ATA disk in the system.
- The second line gives you information about the geometry of this disk (It's not important that you understand the geometry of your disk unless FreeBSD is having trouble detecting it).
- The next several lines give you information about each currently defined partition on the system. If this is a new disk, or if you deleted all the partitions on it before installing FreeBSD, there will be only one partition with the description "unused" that takes up the entire disk.
- To assign all available space on this hard disk to FreeBSD, simply select A for Use Entire Disk(Caution Selecting the entire disk for use deletes everything currently on the disk. Make sure you have backed up any information you want to keep from the disk.). After this, you should see a line that shows a single partition of subtype 165 with the description freebsd. You will also see a line(or two) with the description unused. Don't worry about this it's normal, even when you're selecting the entire disk for use.
- Go to line with desc column "freebsd" and press S(set bootable)
- Press Q to exit the Partition Editor.Do not press W (Write Changes) first because that option is intended only for making changes to existing filesystems, not for initial installs.
Column InformationOffset The starting sector of the partition.
Size (ST) The size of the partition in sectors.
End The last sector in the partition.
Name The FreeBSD-assigned device name of this partition (if known).
PType A number representing the partition type.
Desc The type of partition.
Subtype More information about the partition type.
Flags The following symbols can appear in this column:
= The slice is properly aligned.
> The slice extends past the 1,024th cylinder on the hard disk. This becomes an issue later on when you create the disk labels because boot partitions that extend past the 1,024th cylinder can cause problems on some systems (this is a BIOS limitation, not a limitation of FreeBSD).
R The slice contains the root filesystem, which is the top-level filesystem on the FreeBSD system.
B The slice uses BAD144 bad-spot handling.
C The slice is a FreeBSD partition.
A The slice is the active partition (that is, the slice is the bootable slice).
Tip Press Z to toggle the display units between sectors, kilobytes, megabytes, and gigabytes.
FreeBSD's boot manager
Now FreeBSD will ask whether you want to install the FreeBSD boot manager.

- If you are installing FreeBSD on a drive other than the first one, select the BootMgr option. You also select this option if you are installing more than one operating system on this drive.
- If FreeBSD is the only operating system to be installed and it will be installed on the primary drive, you can select the Standard option(here i choose that option).
- If you have only a single hard disk on your system, you will receive a message that tells you to create BSD partitions inside the fdisk partition(s) just created. Go ahead and press Enter to go to the Disk Label Editor.
- If you have multiple disks, go back to the disk selection menu.
Note: Unlike with Linux, you do not create multiple partitions on a single disk for FreeBSD, even if you will probably be creating more than one partition on the disk to hold your FreeBSD filesystems. You use the Disk Label Editor to create the separate areas for your different filesystems.
The Disk Label Editor
The Disk Label Editor is where you will actually create the filesystems that will hold the FreeBSD installation. In this system, you subdivide the storage space in the partitions (slices in BSD slang) you created in the Partition Editor into subpartitions (BSD partitions) that are attached(mounted) to specific locations in the system. When you first enter the editor, it will look like this:
FreeBSD Disklabel Editor

Disk: ad0       Partition name: ad0s1   Free: 234436482 blocks (113664MB)

Part      Mount          Size Newfs   Part      Mount          Size Newfs
----      -----          ---- -----   ----      -----          ---- -----

The following commands are valid here (upper or lower case):
C = Create        D = Delete   M = Mount pt.            W = Write
N = Newfs Opts    Q = Finish   S = Toggle SoftUpdates   Z = Custom Newfs
T = Toggle Newfs  U = Undo     A = Auto Defaults        R = Delete+Merge

Use F1 or ? to get more help, arrow keys to select.
Beginning with FreeBSD 5.0, the Auto Defaults option provides reasonable defaults that will work for most purposes. If you aren't sure about partitioning (explained in the next section), you should probably choose:
- the Auto Defaults option (press A) and then
- press Q to quit the editor and move on to "Selecting a Canned Distribution Set," later in this section.
Manual Partitioning
At a bare minimum, you need to create two partitions:
- a root filesystem and
- a swap partition.
In fact, there is at least one well-known Linux distribution that encourages putting everything in the root filesystem.This is a dangerous way to live for two reasons.
- FreeBSD and all other versions of UNIX are powerful multitasking operating systems. They are almost always doing something especially on a busy server. These systems usually have several files open at the same time, and they often write to the disk. If the system crashes, a power failure occurs, or the janitor runs the vacuum cleaner over the server's power cord while a write is in progress, the filesystem can be damaged. Depending on what was being written when the crash occurred, the damage can be severe enough to destroy the filesystem. Filesystem damage is far less likely to occur if the filesystem is not being written to when the crash or power failure occurs. This is why it is a good idea to use multiple filesystems. It not only helps to restrict damage to one area instead of the entire system it also helps protect the all-important root filesystem. In a properly laid-out filesystem, the root partition is almost never written to.
- The second reason why having everything in one partition is dangerous is that it opens a server to various forms of malicious Denial of Service (DoS). Whether these situations are intentional or not, they can occur, and all too frequently they do. For example, on a system in which user disk quotas are not enforced, a user could either intentionally or accidentally (through the misuse of the command that copies files) create a file that fills up the entire partition where the home directory is located. If all the filesystems are located on that same partition, this would do far more than prevent users from saving files in the home directory. Other fallout from this event could include denial of mail service because there is no room in the mail spool directory, and denial of print service because there is no room to queue print jobs. Also, the web server could stop serving because it can't write its log file. syslogd (the program that logs system messages) will be unable to record important messages, which could allow crackers to enter your system undetected. Any programs that need to write temporary files will fail because no room is left in the tmp filesystem.
- One for the root filesystem (/)
- one for the swap space
- one for the user filesystem (/usr)
- one for the var (/var) filesystem
- and a final one for temporary files that's writable by all users (/tmp)
Some people recommend placing the /var filesystem in the same partition as /usr because it is difficult to judge how much space to give /var. I don't recommend doing this, however, because it subjects your system to various possible Denial of Service attacks especially if users' home directories are also located in the same partition as the /usr filesystem.Note FreeBSD has the capability to use more memory than is actually installed in the system, through the use of what's known as virtual memory.
To use virtual memory, FreeBSD moves to the disk any memory pages that are not currently in use. That frees up room in memory for data that's currently needed. When a memory page that was moved out to disk is needed again, FreeBSD moves it back into memory and, if necessary, moves something else in memory out to the disk to make room. These operations are known as swapping, and the area of the disk that the swapped-out memory pages are stored in is called the swap partition. To help you better decide what filesystems you want to put on each partition, Table 2.4 describes some of the directories in FreeBSD and what they are used for.
Note that this is not a complete list; it has only the directories for which you might want to have separate partitions.
Table 2.4. FreeBSD Directories and Their Purposes
- "/" the root filesystem: It is the directory under which all other filesystems will appear (even if they are located on different partitions, different disks, or even different computers on different continents). The root filesystem needs to have a partition, and FreeeBSD's philosophy is that the smaller this partition is, the better. 256MB should be enough for this partition. If you are really tight on space, you could probably get away with as little as 100, but don't go any lower than that. Note that FreeBSD will give you a warning if you set the root partition to less than 118MB. Every other partition lies “under” the root partition or is subordinate to it. With an intact root partition, you can boot the system to the bare-bones single-user mode and perform repairs on the rest of the system. Your system needs fast access to the root partition, so put it first on the disk. Because root holds only the basic utilities and configuration files, it doesn’t need to be large; FreeBSD defaults to configuring 512MB for a root partition, which is more than sufficient.
- Swap Space The next partition on your drive should be the swap space—the disk space used by virtual memory. When FreeBSD uses up all the physical RAM, it moves information that has been sitting idle from memory into swap. If things go well, your system doesn’t need swap space—but if you do need swap, it must be fast.
So, how much swap space do you need? This is a matter of long debates
between system administrators. The short answer is, “it depends.” Long-
running wisdom says that you should have at least twice as much swap as you have physical memory. Long-running wisdom has become obsolete, however,and the capacity of modern systems has invalidated this rule of thumb.
When a process runs out of control and starts allocating memory (say, in an infinite loop), the kernel will kill the process once the system runs out of virtual memory. If your system has 6GB RAM and 9GB swap, this process will need to consume 15GB of memory before the kernel kills it! i386 systems have about 3GB of virtual address space, and they must share that with the kernel, shared libraries, the stack, and so on. The i386 platform limits memory usage to 512MB per process, which means that the kernel will stop a runaway process fairly quickly. 64-bit systems, like amd64, have vast virtual memory space and a process could conceivably devour gigabytes of memory. If a system is thrashing gigabytes of memory between disk and RAM, it will be unresponsive, slow, and generally troubled. Today, you should have enough swap to do your work. I recommend provisioning as much swap space as you have RAM, perhaps even a few megabytes more. The main use for swap on modern systems is for a dump in case of a system panic and crash. For maximum safety, you want enough swap space to dump the entire contents of your RAM to swap. This is a worst-case crash dump. FreeBSD 7.0 and later defaults to using a kernel minidump, however, which only dumps the kernel memory. A minidump is much smaller than a full dump—a system with 8GB RAM has an average minidump size of about 250MB. You can probably get away with only providing 1GB of swap, which leaves plenty of room for even a bloated kernel minidump. - /boot: The kernel, its modules, and other files required to start the operating system are located in the boot directory. You can have a root partition that extends past the 1,024th cylinder by putting /boot on its own partition. (Note that /boot has to be contained completely in the first 1,024 cylinders.)
- /usr: The /usr partition holds the operating system programs (that will be accessed by normal users), system source code, compilers and libraries, add-on software, and all the other little details that make the system actually do anything. Much of this changes only when you upgrade your system. It also holds users’ home directories, which change regularly and rapidly. If you have many users, consider creating a separate /home partition. While you can assign quotas to control disk space, a separate partition will protect your all-important OS files. On a modern hard drive, I recommend using at least 6GB for /usr. This provides enough room to run the operating system, store the main system source code, and build upgrades to the next version of FreeBSD. On a web server where users upload website files to their home directories, I suggest giving this partition the majority of your hard drive.
/usr should definitely have its own partition. Traditionally, /usr consumes all the space on the disk that is not allocated to the other partitions with their specialized recommended sizes. - /usr/local: This is where third-party software that is not part of the operating system is installed (such as web servers and database programs). Some people like to put /usr/local on its own partition, separate from the /usr partition. Personally, I don't recommend this for normal operations. The only time I would recommend this is if you have multiple disks and need to split /usr for space reasons.
- /var: This is where the system stores "variable" files, frequently changing logs, mail spools, temporary run files, upgrade files from tools such as portsnap and FreeBSD-update, and so on or files that are written by programs as part of their operation (such as runtime data files, database content, and logs). I like to put /var on its own partition. Some of the things stored in /var include incoming mail, system logs, web server logs, and jobs queued for the printer. The size you need to make /var depends on whether you will be running a print server, mail server, or web server. Note that on a busy web server, log files can easily grow to more than 100MB in only a couple of days. If you are going to be running a high-profile web server, either give /var a lot of space (2GB or more) or make sure you rotate your logs often. If you expect to receive a lot of mail in a small “generic” mail server or web server, you will also want to make /var quite large, I’d use a third of my remaining disk space for /var with several gigabytes of space to store all your users' mail spool files (which can become very large, especially if unmaintained). I’d kick this up to 70 percent or more, or just assign sufficient space to the other partitions and throw everything left on /var. If you’re really cramped for space, you might assign as little as 30MB to /var.
Make /var larger than physical memory. By default, FreeBSD writes crash
dumps to /var/crash. If you have enough empty space in /var to write the
contents of your physical memory, that will help should you ever start having serious system trouble. - /tmp: The /tmp directory is the system-wide temporary space, open to all system users and programs where programs and users can write temporary files. This directory is usually cleaned out automatically at each reboot. Properly behaved programs that need to write very large temp files should not use this directory; they should use /usr/tmp or /var/tmp instead, to avoid overfilling the small root partition. You can either give /tmp its own partition (as is the default behavior in Sysinstall) or link it to a place in /usr. Also, note that if a particular operation requires more temp space than is available, you can temporarily change the location where temp files are written for that one operation. If you do not create a separate /tmp partition, it will be included on your root partition. This means that your system-wide temporary space will be subject to the same conditions as the rest of your root drive. This probably isn’t what you want, especially if you plan to mount your root partition read-only.
Requirements for a /tmp directory are generally a matter of opinion—after all, you can always just use a chunk of space in your home directory as temporary space, and there’s always the /var/tmp directory if you have large files that you need to work with temporarily. On a modern hard drive, I like to have at least 512MB in a /tmp directory. Automated software installers frequently want to extract files in /tmp, and having to work around these installers when /tmp fills up is possible but tedious.
On systems where you don’t expect /tmp to use much space (for example, web servers and database servers), you might want to use a memory filesystem for /tmp (If you intend to use a memory filesystem, do not create a separate /tmp partition.). - (/usr)/home This is where users' home directories are located. It is placed (default) under the /usr partition. If you are going to have a lot of users and you expect them to have a lot of files, you might want to put /home in its own partition or even give /home an entire disk.
The Root Partition
If you aren't using a dedicated /boot partition, the first partition on your drive should be the root partition (/). To create the root partition:
- use the up or down arrow key to highlight the disk slice (labeled with Disk and Partition name fields, as well as a readout of how much unallocated space is available on it) at the top of the Disk Label Editor that you want to put the root partition on.
- Then press C for Create Partition.You then see a dialog box that asks you for the size of the partition. As mentioned previously, 256MB should be sufficient for the root partition. As the dialog box says, you can specify a size in megabytes by adding an M to the end of the number. So, assuming you want to make your root partition 256MB in size, enter 256M at the prompt and then press Enter.
- You are then asked to choose a partition type for this partition. Because this will hold the root filesystem, select the FSA File System option and press Enter.
- You are then asked to specify a mount point for this partition. The mount point is the directory under which the filesystem will be available. Because this is the root filesystem, enter / in this box and press Enter.Your screen should now look similar to this:
FreeBSD Disklabel Editor
Disk: ad0       Partition name: ad0s1   Free: 29761379 blocks (113408MB)

Part      Mount           Size Newfs   Part      Mount           Size Newfs
----      -----           ---- -----   ----      -----           ---- -----
ad0s1a    /              256MB UFS1   Y

The following commands are valid here (upper or lower case):
C = Create        D = Delete   M = Mount pt.            W = Write
N = Newfs Opts    Q = Finish   S = Toggle SoftUpdates   Z = Custom Newfs
T = Toggle Newfs  U = Undo     A = Auto Defaults        R = Delete+Merge

Use F1 or ? to get more help, arrow keys to select.
This code shows that you now have a filesystem at ad0s1a (the device name and slice entry that FreeBSD uses to refer to this filesystem), it is mounted on /, the size is 256MB, and it is of type UFS1 (the standard filesystem type for FreeBSD). Next, you deal with the swap partition.
The Swap Partition
FreeBSD is a virtual memory operating system; Of course, accessing something from the hard disk is many times slower than accessing something from RAM, so swap space is no alternative for having enough RAM in a system. But still, swap space is a crucial part of how UNIX and all modern operating systems operate, and a key reason why you seldom have to worry about "Out of Memory" errors these days.
The proper (or improper) configuration of your swap partition can have a significant impact on the performance of your system. Here are some guidelines for choosing where to put your swap partition:
- Put the swap partition as close to the beginning of the disk as possible. Lower-numbered cylinders on the disk, which are closer to the edge, can be accessed and read faster than higher-numbered cylinders (they're moving faster than the ones in the middle).
- If you have multiple drives in your system, as a general rule, you should put the swap partition on the fastest drive in your system.
- If the fastest drive on your system is also the most heavily accessed by users, web servers, mail transfer agents, and so on, you will probably want to ignore the previous point and put the swap partition on the least-accessed drive in your system. Not only does this allow more time for the drive to access the swap space instead of accessing other things, but it also increases the chances that the hard disk heads will already be positioned within the swap partition when swapping is needed. Little things like the time it takes the hard disk heads to cross the disk to where the swap partition is located really make a difference during high loads and heavy swapping.
Long ago, when RAM was an expensive commodity and most users made do with 4MB to 16MB of RAM, the rule of thumb was to have 2.5 times as much swap space as you had RAM.
But today, RAM is cheap and affordable. A high-end workstation with 1GB of RAM and servers with 4GB or more of RAM are not uncommon these days. The average user can afford to have more RAM than he actually needs. At the same time, though, hard disk space is cheap too, and it's easy to outfit a new system with a disk that's far larger than you need. Because it's much easier to boost the RAM in your system (simply by plugging in new memory modules) than upgrade your primary installation to a bigger disk, you might still want to make sure to start out your FreeBSD career with a swap partition that's at least twice the size of your available RAM.
That way, when you double your system's RAM, you won't have to worry about resizing your swap partition because it will still be at least the size of the physical RAM, and thus still useful. 512MB of swap space is a nice number to use if you have.512MB of RAM or less and you aren't really pressed for disk space. If at all possible, you should try to have at least as much swap space as you have RAM.
If you plan to do development or track the FreeBSD CURRENT branch, this is practically a necessity. Here is why. Occasionally, something happens that the operating system's kernel doesn't know how to handle. When such an event occurs, the kernel gives up, panics (you get a message that reads "Kernel panic"), and then reboots the system. If configured to do so, however, the panicked kernel attempts to dump the contents of RAM into the swap partition before it reboots. The contents of RAM when the panic occurred are essential to programmers for debugging what is causing the panics.
One of two things happens if there is more information in RAM than can fit in the swap space:
- The kernel will refuse to dump the RAM contents. This is the most likely scenario. In this case, no debugging information will be available for diagnosing the cause of the panic.
- If the panic was caused by some state of confusion in the kernel over something regarding the filesystems, it's conceivable that the kernel could dump the RAM contents to the swap partition and keep right on going when it hits the end boundary of the swap partition. The result would likely be irreparable damage to whatever filesystem came after the swap partition on the disk.
UNIX kernel panics are similar to the infamous BSOD (Blue Screen of Death) errors in Windows NT/2000/XP. If you are used to working with Windows, you can breathe a sigh of relief you won't be seeing nearly as many kernel panics with FreeBSD as you see blue screens in Windows, especially if you don't use any experimental kernel patches or untested features. I've personally only had one kernel panic on my FreeBSD workstation in nearly 12 years of working with FreeBSD.After you decide on a size for your swap partition, create it just like you created the root partition, except this time select a Swap Partition when prompted for the filesystem type. The swap partition does not get a directory mount point, so you will not be asked the question about where you want to mount the partition when you are creating a swap partition.
Creating the Rest of the Partitions
After you create the root (and possibly boot) partition and the swap partition, create the rest of the partitions as filesystems, give them the sizes you decided on earlier, and set the mount points to the proper directories when asked (for example, /usr or /var). Don't forget to include the leading slash.
If you prefer to let Sysinstall figure out how to allocate disk space to your partitions, simply delete any partitions you've created already and press A for Auto Defaults. The mount points and partition sizes created by this option are usually appropriate for all but the most specialized configurations.You can correct any mistakes and re-create your partitions at any time during this session; no changes are made to your disk until the very end of the process. Simply highlight a partition and press D to delete it, and then move up to the slice at the top of the screen and press C to create a new partition.
If you have more than one hard disk on your system and you need to switch between them, use the up and down arrow keys to move the highlighted line over the disk at the top of the screen on which you want to create the partition.Here is an example of what a final result might look like:
FreeBSD Disklabel Editor

Disk: ad0       Partition name: ad0s1   Free: 0 blocks (0MB)
Disk: ad1       Partition name: ad1s1   Free: 0 blocks (0MB)

Part      Mount           Size Newfs   Part      Mount           Size Newfs
----      -----           ---- -----   ----      -----           ---- -----
ad0s1a    /              256MB UFS1   Y
ad0s1b    swap           756MB SWAP
ad0s1e    /var           256MB UFS1+S Y
ad0s1f    /tmp           256MB UFS1+S Y
ad0s1g    /usr         48817MB UFS1+S Y
ad1s1e    /home       124664MB UFS1+S Y


The following commands are valid here (upper or lower case):
C = Create        D = Delete   M = Mount pt.            W = Write
N = Newfs Opts    Q = Finish   S = Toggle SoftUpdates   Z = Custom Newfs
T = Toggle Newfs  U = Undo     A = Auto Defaults        R = Delete+Merge

Use F1 or ? to get more help, arrow keys to select.
This example has two hard disks in the system, and the /home directory is on a partition in the second hard disk that takes up the entire disk. Note When creating a partition, if you get an error message at the bottom of your screen that reads "You can only do this in a master partition (see top of screen)," it means that you have to highlight one of the filesystem partitions (slices) at the top of the screen. Use the up arrow until the highlight is on the disk slice on which you want to create the partition and then try again to create the partition.
Soft Updates Starting with FreeBSD 5.0, Soft Updates are enabled by default on most filesystems (except for /). For now simply know that they can greatly increase the performance and reliability of most filesystems, so you probably want to leave them enabled. To enable Soft Updates on a filesystem, move the highlight over the filesystem you want and press S to toggle Soft Updates on or off. A filesystem that has Soft Updates enabled will have +S following the filesystem type (for example, UFS1+S). After you finish creating partitions, press Q to leave the Partition Editor. Once again, do not use the W option because this is intended for making changes to existing filesystems, not for installing new ones. As long as you're still in the same Sysinstall session, all the changes you've made so far are stored in memory and pending the final commitment after you choose the type of software installation you want. The next screen will ask you what parts of FreeBSD you want to install.
Selecting a Canned Distribution Set
 A "distribution" of FreeBSD refers to the subset of available software you can choose to install.
Not all software is appropriate for all users. If you're not interested in working with the source code, for instance, you don't have to install it.
- If you have the space, though, I suggest that you select the All option.
- If you are running a server and you are sure you will not need the X Window System, you can select the Developer option instead.
- If you select an option that doesn't include the source code, you cannot build a new kernel or upgrade the system through CVSup (unless you download all the sources while running CVSup, which negates the space-savings of not installing the sources here).
- If you select an option that only installs the kernel sources but not the rest of the sources, you will be able to build a new kernel, but you still can't upgrade the system with CVSup.
- If you are a new user, you probably won't know what most of these packages are for. Therefore, I suggest you stick to one of the canned distributions preferably, the All distribution.
Note CVSup is a file synchronization system that automatically updates the FreeBSD operating system by connecting to servers and determining what has changed since the last time you ran CVSup. Any changes are automatically downloaded from the server and applied to the FreeBSD source code. This is much faster than downloading the entire source tree. With CVSup, only the things that have changed need to be downloaded.To select a distribution, highlight the one you want and press the spacebar.

 Tab key to select the option you want and then press Enter. Next, you return to the Choose Distributions menu. The distributions you selected should be indicated with X marks; if you selected the All option, each of the distributions is selected. Use the up arrow to go to the Exit option and then press Enter.
Choosing the Installation Media

Note If you're installing from floppies, select FTP and press Enter. At this point you are required to set up your network card so that Sysinstall can access the FTP server and download the operating system installation files. You're presented with a list of network devices (Ethernet cards), each with a label that should convey which one is the appropriate one hooked up to your network; generally speaking, the first option in the list, often with a device name such as fxp0, is correct. To set up the networking options for the selected Ethernet card, skip ahead to "Configuring the Network" later in this section; return here when you're done entering your TCP/IP information.Assuming that you are installing from a CD or DVD, make sure the CD/DVD

Assuming you are happy with the installation choices you made,
- select Yes.
- The system then prints a message telling you it is starting an emergency holographic shell on vty4, meaning that you can press Alt+F4 to switch to a command prompt to correct errors that might crop up. (Alt+F2 lets you watch the files being listed as they're installed. Press Alt+F1 to return to the Sysinstall screen.)
- It then proceeds to format the partitions.
- After partition formatting is done, Sysinstall will begin copying files to your hard disk(s). The installation process can take as little as fifteen minutes or as much as several hours, depending on your installation medium. A fast optical drive will make short work of the installation, whereas if you're installing from floppies, your computer must download the entire operating system from the FreeBSD FTP server several hundred megabytes. A floppy/network
 installation's length depends heavily on the speed of your Internet connection, and the slower your link, the longer it will take. If you need to leave the installation process going overnight, go ahead nothing requiring your immediate attention occurs after the installation is over.

Post-installation Configuration and Customization

- set the time
- configure the mouse
- choose the desktop,
- choose software packages
- set users you want to assign to your system and
- set the root password
Configuring the Network
 Next, you are asked if you want to configure any Ethernet or SLIP/PPP network devices. (This step will not be necessary if you are installing from floppies; you already had to configure your network earlier in the process.) If you have the necessary network configuration information from your system administrator, you can go ahead and set these up now. If you don't have this information available or if you are setting up a new network and are unfamiliar with networking, you can always re-enter this utility later.
 Caution If you are on a network and you do not configure the network device(s) now, be aware that when the system reboots, you cannot access the network until you configure the network devices to work with it.If you don't want to configure any network devices now, simply select No and move on to the next section. If you do want to configure network devices at this time, select Yes.
- You should now see a screen. Select the network device you want to configure from the list and then press Enter. Note that depending on the make and model of your Ethernet adapter, it may have various names. It will usually have the number zero, though (for example, fxp0), if it is the first or only Ethernet adapter in the system.
- After you select the network device you want to configure, you are asked if you want to try the IPv6 configuration of the interface. Unless you are sure your network has an IPv6 server on it that is set up to send you configuration information, you should select No.
- The next question asks you the same thing about the DHCP configuration of the interface. If your network has a DHCP server on it, FreeBSD will attempt to contact that server and obtain its network information. If your network does not have a DHCP server, you should select No.
- If you're on a corporate or routed home network and you're not sure whether DHCP is available, select Yes most routed networks have DHCP servers. If DHCP responds by filling in your network information, you can skip the next few steps. The next screen allows you to enter the information about your network.
Field Description General Network Options for This System
- Host The hostname and domain name of your system go here (in this example, simba.example.com).
- Domain The name of the domain name where your system is located (in this example, example.com).
- IPv4 Gateway If your system will use a router to access non local network resources (the Internet), put the address of that router here.
- Name server The IP address of your DNS server, which is the server that resolves network names into IP addresses.
- IPv4 Address The IP address of this system.
- Netmask The netmask value for the network that this interface accesses.
Caution If you aren't sure what numbers or names should go in the Network Configuration screen, ask someone who will know. Never simply fill in random numbers or names if your system is on a network. If your system is connected to a network, simply inserting random numbers in the IPv4 Address field or a random hostname in the Host field is a sure way to get on the bad side of the network administrators as well as other network users. If you select an IP address that conflicts with an existing system on the network, bad things will happen, including possible denial of service to an important network resource if your IP address conflicts with that of a major server.Use the Tab or Enter key to move between fields. When you are done, select OK to leave the configuration screen. Depending on the type of network interface you set up, you may now be asked if you want to bring the interface up right now. Select No because you are almost done with the install and will be rebooting the system soon anyway. Sysinstall will then ask you a series of questions about the network:
- Do you want this machine to function as a network gateway? Unless this machine will be a gateway that other systems on the network will use to get to the Internet, or a router that will handle network traffic intended for other systems, you should select No. Otherwise, select Yes
- Do you want to configure inetd and the network services it provides? The inetd "super-server" is a process that handles incoming requests for certain types of services, such as Telnet, FTP, POP and IMAP mail services, and others. In the modern age, services that are launched from inetd are becoming rarer, and inetd itself is thought of as a security breach waiting to happen. If you don't have a need for the services provided by inetd, or if you're not sure, select No you can always enable it later if you have to.
- Would you like to enable SSH login? Select Yes here. SSH allows remote users to connect to a shell prompt (the UNIX command line) on your FreeBSD machine over a secure, encrypted channel. It's vastly preferable to use SSH than the unencrypted alternative, Telnet; it's good policy to require that all your users use SSH instead of Telnet for their remote access. However, if you don't want any remote access to your machine to be possible at all, choose No.Caution Enabling SSH means opening up your system for remote users to access its command-line interface after sending their usernames and passwords over the network. Although SSH is a secure transmission protocol, its security won't help you if your password is easily guessed or found through a brute-force attack. You should therefore never consider SSH alone to be a sufficient protection against unauthorized access, and it's imperative that you choose sufficiently strong or hard-to-guess passwords.
- Do you want to have anonymous FTP access to this machine? I suggest you select No unless you know what you doing. You can always configure anonymous FTP access later on if you need it.
- Do you want to configure this machine as an NFS server? The NFS server allows you to share directories on your hard disk so that users on other systems can mount them and read or write files to them. Once again, unless you know what you doing i suggest you select No for now, even if you know that you will need this service. NFS can be a security problem if it's not set up properly.
- Do you want to configure this machine as an NFS client? If you need to mount filesystems on your drive that are located on other computers, you need to set up the NFS client.
- Customizing the Console Next, you have the opportunity to customize the FreeBSD console settings. You can use these settings to customize the behavior of your keyboard, to choose which font will be used on the screen display, and to select which screensaver to use. If you select Yes to the question asking you whether you want to customize your console settings, you see a menu. Most of these options don't need any explicit configuration; they're set by default to settings that will work as expected with most modern hardware. However, you can experiment with settings such as Font and Saver to alter how your console appears and blanks its screen, or Repeat to adjust the keyboard repeat rate. Other options, such as Keymap and Screenmap, are less self-explanatory:
- Keymap allows you to choose a different keyboard layout from the default U.S. English layout, which you'll need to do if you're using a keyboard with a different set of keys.
- Similarly, the Screenmap option lets you choose a character set mapping that is appropriate for your country if the default one doesn't work for you; if you have older hardware where the built-in font can't be changed, it allows you to select how the text you encounter should be translated into text the hardware can display.
- Finally, the Ttys option (Terminal TYpes) allows you to change the default console terminal emulation mode from the default VGA terminal (cons25) to another whose behavior matches the screen mapping you choose in the Screenmap section.
Setting the Time Zone
- Next, Sysinstall asks whether you want to set the system's time zone. Select Yes.
- The next screen will ask whether your system's clock is set to UTC (known also as Coordinated Universal Time, Greenwich Mean Time, and Zulu Time). It probably isn't, so unless you are sure your clock is set to UTC, select No.
- The next menu asks you to select your region, your country, and other information about where you are located. After you provide Sysinstall with all this information, it shows you a three-letter abbreviation(like "CEST") for your time zone and asks whether this abbreviation looks reasonable. If it looks correct, select Yes. If it doesn't, select No. You can always come back and do it again.
The next question asks whether you would like to enable Linux binary compatibility. If you select Yes, Sysinstall will install a mini-Linux filesystem in your /usr partition that includes the Linux share libraries and other necessary programs for Linux to run on FreeBSD. Unless you are sure you will not be running any Linux programs, I suggest you select Yes. This can be a very useful option.
Note Your first thought might be that you don't want to install the Linux binary compatibility module. If you've worked with emulators under other operating systems, you know how slow they can be. With FreeBSD, however, this is not the case. Linux support in FreeBSD is not done through an emulator but rather is implemented at the kernel level. FreeBSD's Linux support is so good that it runs most Linux applications as fast as native Linux. In fact, FreeBSD will even run some Linux applications faster than Linux itself runs them!
Configuring the Mouse
In FreeBSD, you can use your computer's mouse whether you're in the text-mode console or in the graphical X Window System. The text-mode (console) mouse driver gives you the ability to copy and paste text at the command line or in console programs, making use of all three buttons on your mouse, if available. If the system will be a purely "headless" server, with no windowing system and no need for a console mouse pointer, you can elect not to enable the mouse driver. However, if you're going to be using FreeBSD as a desktop operating system, you'll want your mouse to work, and you need to configure and enable the mouse driver.
- First, FreeBSD asks you whether you have a non-USB mouse attached to your system. Non-USB mice include PS/2 mice (as is standard on most PCs the mouse plugs in right next to the keyboard, with a round plug) or serial mice that connect to the COM1 or COM2 port. Select Yes if you have a PS/2 or serial mouse, or No if your mouse connects through USB.
- The next screen contains several steps for configuring your mouse. If you don't plan to use the mouse, in X or in the text console, select Disable here and skip the rest of this section. Otherwise, select Type to specify the type of mouse. The following screen contains several options for specialized or old-style mice, but the default Auto is correct for just about any PS/2-style mouse available today. It's also the appropriate option if you have a USB mouse.
- Next, select Port. If you have a PS/2 mouse, select Auto (the default). Otherwise, choose the appropriate serial port where your mouse is connected.
- The X Window System makes use of all three buttons on a standard mouse. If you have a mouse with only two buttons on it, you need to emulate a three-button mouse by telling the mouse driver to interpret the clicking of both buttons at the same time (what's known as a chord) as a click of the virtual third button. You can do this by selecting the Flags option on the menu and typing 3 in the dialog that pops up. Another useful option you might want to put in here is -r high to make the pointer move faster or -r low if the pointer moves too fast and you want to slow it down. If you need both options, you can use 3 r high, for example.
- After you finish configuring the mouse settings, select the Enable option to test and run the mouse daemon. If the mouse is set up correctly, you should now be able to move the mouse pointer around on the screen. When you are done testing the mouse, select Yes if the mouse worked (note that the mouse still doesn't work in the menu; you still need to use the arrows and the Tab key) or choose No if it didn't.
- You are then returned to the mouse configuration menu. Assuming that the mouse worked, select the Exit option.
Installing Additional Software Packages
Select Yes when asked whether you want to browse the FreeBSD package collection. From the menu that follows, you can install some additional software that will be useful. Feel free to browse through the collection as long as you want to see what is available. For now, I don't recommend that you install a ton of software at this point the first priority is getting your system booted, and it's very easy to add software later, once you're up and running. There are a few packages that I recommend you install for use in the next few chapters, however. When you're asked where you want to install the packages from in the Choosing Installation Media menu, select CD/DVD if you are installing FreeBSD from the included CD-ROM. Otherwise, select FTP to get the packages from the distribution server. To navigate through the package installation system,
- use the arrow keys to move between packages and categories.
- Use the spacebar or Enter key to select or unselect a package.
- When you have finished selecting packages in a category, use the Tab key to highlight the OK option and
- press Enter to get back to the main selection menu (where you can select the category you want to browse).
- Packages that are already installed will have an X next to them; unselecting these packages causes them to be uninstalled.
Adding a User

- Login ID Login ID is the name you use to identify yourself to the system when you sign in. The ID you type in this field should not be more than eight characters long, for compatibility reasons, though FreeBSD supports usernames up to 16 characters long. Common conventions are to use initials, nicknames, or combinations of initials and first or last name. For example, I might use brian, briant, or btiemann as my login name. Each user on the system must have a unique login name. Names are case-sensitive and, by convention, use all lowercase letters. Spaces and special characters are not allowed, aside from the hyphen (-) and underscore (_).


- UID UID is a numeric ID that the system uses to keep track of users. You should leave this field alone and let the system pick the number for you.
- Group This field refers to the primary group you will be a member of. Once again, leave this field alone and let the system pick for you.
- Password In this field, you type the password you will use to log in. Passwords are case-sensitive. Here are some guidelines for choosing good passwords that crackers (commonly known as hackers, although this is not the correct term for people who illegally break into computer systems) can't figure out:
- Use at least eight characters. Short passwords are easier for programs designed to try random combinations of letters and numbers to crack.
- Use a combination of uppercase and lowercase letters, numbers, and at least one special character, such as $ or !.
- Don't use words found in a dictionary. Password-cracking programs exist that go through the dictionary trying various words until they hit one that works.
- Don't use things that other people know about you or can easily find out about you. In other words, the name of your child, your cat, or the city you were born in does not make a good password.At the same time, it's good to pick something you can remember easily. Some techniques for doing this include combining parts of various words together (remembering, of course, to include both uppercase and lowercase letters and to stick a few numbers and at least one special character in somewhere).
- You can also use what I call keyboard substitution a technique where you pick a word that means something to you (but that others will not know) and then substitute the character to the upper-left, upper-right, lower-left, or lower-right as the actual character in the password. For example, Alice becomes Qoid3.
- After you decide on a password, enter it carefully you will not be asked to verify it. The password will show up on the screen as asterisks (*). If you mistype it, you will not be able to log in (if you accidentally do mistype the password, i tell you how you can fix it later).After you decide on your password, do not write it down anywhere. Do not write it on the bottom of your desk. Do not write it down in your appointment book. Do not have it tattooed on your arm. And whatever you do, do not write it on a Post-It note and stick it on your monitor. (I know that seems like stating the obvious, but you would be surprised how many users do just that.) Also, do not tell your password to anybody, including your coworkers, your spouse, or your children.
- Full Name You can either type your name in this field or leave it blank (remove the default --User &-- if you intend to leave it blank). Note that some programs, such as the UNIX mail program, will use this field to determine what to put in the From field of the email you send. Therefore, it is probably a good idea to enter your name here.
- Member groups I suggest you type wheel in this field. This will make you a member of the group "wheel," which will allow you to assume the identity of the root user (super-user or system administrator) without having to log out and log back in as a different user (although you still need to supply the root password to do this).
Caution It's very important to set up at least one wheel user right away this ensures that you'll be able to connect to the computer remotely, using that user account, and become root (using the su command) to perform system administration tasks. You can't SSH directly to the machine as root (without performing some extra tricks); unless you have a non-root user who can log in remotely and assume root privileges, you'll be dead in the water once you leave the facility where the machine has been installed.
- Home Directory This field lists the place where your home directory will be located on the hard disk. You should leave this field alone and let the system choose for you.
- Login Shell The login shell(default /bin/sh: Bourn shell) is the default command-line shell you will be placed in after you log in. Assuming you installed the bash shell, as suggested earlier, I suggest you type /usr/local/bin/bash in this field(provided you just installed bash). If you later decide you do not like the bash shell, it is easy to change your default shell to a different one.
Note Be aware that /bin/csh, the default built-in shell included in FreeBSD, is the same thing as tcsh (also available by default at /bin/tcsh)

- Moreover if you want you can add new groups
- After you finish entering the information, tab over to the OK button and press Enter. The user account will be created for you, and you will be returned to the menu shown earlier. Select the Exit option if you don't set another user.
Setting the Root Password

Changing local password for root.
New password :
All the guidelines you read earlier for choosing and protecting your normal user password are doubly important here. Anyone who knows your root password (or can find it out) can access anything on your entire system and can do anything to your entire system as well. He will have access to read confidential information, email it to other places, change or destroy data on your system, and do whatever other evil things he pleases.After you decide on a root password, enter it at the prompt. Notice that it will not show up on screen as you type it. This prevents someone from looking over your shoulder as you type and reading your password or even seeing how long it is (a valuable piece of information in itself, to a password-cracker). After you enter the password, press Enter. You will be asked to verify the password. Type it again and press Enter. Assuming that you typed it the same way both times, the installation will ask whether you want to visit the general configuration menu for a chance to set any last options. Select No. You are then returned to the main menu.Exiting the Sysinstall Program and Rebooting the System
At the main menu, tab over to Exit Install and press Enter. The system asks you to confirm that you want to exit. It then asks you to remove any CD-ROMs or floppies from the drives on your system. After you remove them, select Yes. The system will then reboot.
Note You may find that you've pressed the Eject button on your optical drive but nothing happened. Don't worry. FreeBSD didn't break your drive; it just locked it to ensure you couldn't accidentally eject the DVD or CD in the middle of the install. If you can't open your optical drive, select Yes anyway and wait until just after your system has started to reboot (when it is counting the memory and such). Then, press the Eject button on your optical drive. It should now open and you can remove the FreeBSD DVD.
Tip When the system reboots, you might want to go into your BIOS setup utility right away and configure the system so that it will not try to boot from the optical drive anymore. Some systems can hang for a long time while trying to boot from CD or DVD if there is no bootable disc in the drive (or no disc at all). Although most systems will eventually give up and boot from the hard disk, it can sometimes take as long as a minute or more before the system decides it can't boot from the optical disk and goes to the hard disk instead. Disable CD/DVD booting in the BIOS to avoid this problem. (See your hardware documentation for information on how to configure your system BIOS settings.)
Booting FreeBSD for the First Time
When your system restarts, one of two things should happen: Either you get a boot menu asking you which operating system you want to boot, or, if FreeBSD is the only operating system on the drive, the system begins to boot straight into FreeBSD. If this is not the case, and your system either hangs or boots right into some other operating system without giving you the option of starting FreeBSD.....
- A full-screen textual FreeBSD boot menu, providing several options for booting FreeBSD in various modes and sporting the "daemon" mascot or a FreeBSD logo, is the first interactive part of the boot process. You saw this menu during installation;
- as you did before, press Enter to accept the default option, Boot FreeBSD.You should subsequently get a long series of cryptic messages going past your screen as the kernel finds and initializes your system hardware. Kernel messages are in a bright white color.
- After the kernel is finished loading, it will pass control to a program called init, which starts up various other processes and programs in the system. These messages have a light gray color.
- (In past) The boot process pauses, this first time, to request you to supply
 some random keyboard information. This rather strange request is necessary for the proper operation of the system's "entropy" generator, which is of interest primarily to those users for whom data security is paramount. Feeding random data to the entropy subsystem means that the random number generator that's part of FreeBSD can emit truly random numbers that can't be cracked or predicted. This random number generator lies at the heart of many secure systems in FreeBSD, such as the data path of the startup process itself. While the system is paused and waiting, you have the choice to either hammer on the keyboard randomly to input a pagefull of garbage text (and then press Enter) for a system with good entropy and high security, or to simply press Enter to accept less rigorous entropy. (A third option is to simply wait 300 seconds, or five minutes; this is tantamount to choosing the second option.) If you are impatient, or data security doesn't thrill you, just hit Enter to continue.
 - FreeBSD then generates RSA and DSA encryption keys for your system (which are used for secure communication across networks or the Internet); this process takes several seconds more, but it too is only a one-time event. Eventually, after init is finished, you should be left with the following:
$FreeBSD/i386 (simba.example.com) (ttyv0)
login:
Your display, of course, will have the name of your host and network instead of (simba.example.com). If you didn't set up the network, it will have the system default hostname, which will probably be amnesiac. - Log in using the name root. After pressing Enter, type in the password you gave to root (once again, the password will not display on the screen). Assuming you type the username and password correctly, you will see a welcome message that tells you a little bit about FreeBSD and where you can get help (as well as how you can change this message or get rid of it), and then you are left with a shell prompt, which will look something like this:
Copyright (c) 1980, 1983, 1986, 1988, 1990, 1991, 1993, 1994
The Regents of the University of California.  All rights reserved.
FreeBSD 6.0-RELEASE #0: Thu Nov  3 09:36:13 UTC 2005

#

Shutting Down FreeBSD
FreeBSD (like other versions of UNIX) is a multitasking, multiuser operating system. It is constantly doing something and usually has many files open at the same time. Because of this, you cannot simply turn off the power when you want to shut down a FreeBSD system. First, you have to tell FreeBSD to shut itself down so that it can terminate any programs it is running and save any files it has open in an orderly fashion. The proper way to do this right now is with the following commands (as root user):
# shutdown -h now
# halt
This tells FreeBSD to perform a system shutdown, to halt after the shutdown is complete (as opposed to rebooting or going into single-user mode), and that you want the shutdown to happen now instead of five minutes from now, for example. (Usually you put a delay here so that other users will get a warning of the upcoming shutdown and have time to save whatever files they are working on.)Type shutdown -h now at the prompt and press Enter. You'll see a few messages on your screen, including Broadcast message from root and various status messages from some processes as they shut down. Look for the following message: "System halted Please press any key to reboot" Then, and only then, is it safe to turn off your computer.
Caution Never shut down a FreeBSD system or any other UNIX(also Windows) system by simply turning off the power. Doing so can cause serious damage to the filesystems. You should always issue a proper shutdown first.
Resources
The history of FreeBSD and UNIX is one of the most challenging, yet fascinating, studies in the computing industry, and it's far more complex than has been described here. Numerous lawsuits, changes of philosophical direction, cross-pollination of code, splits, merges, new projects, and abandoned efforts litter any exhaustive account of this ongoing tale. The following links are invaluable sources of information on the subject:- Here's a detailed history of the development of UNIX at Bell Labs, including some rare photographs.
- Here's a reminiscence of the early days of UNIX through the eyes of Marshall Kirk McKusick, a key figure in BSD and FreeBSD history since the days of CSRG.
- Here's Jordan Hubbard's modern history of the FreeBSD project since 1993.
- Here's an amazing printable, graphical timeline of all flavors of UNIX since its inception in 1969, compiled and kept up-to-date by BSD/NeXT fan Éric Lévénez.
- BSD UNIX TOOLBOX 1000+ Commands for FreeBSD, OpenBSD, and NetBSD®Power Users (2008 by Wiley Publishing) by Christopher Negus, François Caen ISBN: 978-0-470-37603-4
- ABSOLUTE FREEBSD 2ND EDITION THE COMPLETE GUIDE TO FREEBSD (2008 by No Starch press) by Michael Lucas ISBN: 978-1-59327-151-0
- for very lazy people: first steps
- a pointer to BSD resources related to particular BSD distributions.
No comments:
Post a Comment